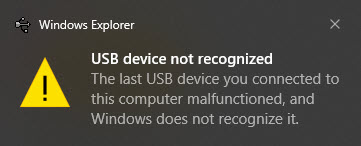
When inserting an ATtiny85 Digispark board on a USB port of a PC running Windows 10, the error “USB device not recognized” pops up. There are only two reasons for this error, assuming your ATtiny85 Digispark board is still good. One, the Windows device driver for Digispark is not installed. And two, the Digispark board does not have the required Micronucleus bootloader installed on it.
Solution 1 – Install the Device Driver for the Digispark Board
Download and install the Windows device driver for Digispark. You can find the latest version here: Digistump Arduino Release 1.6.7. Also, an alternative is to download and install Zadig. It is an application software for installing generic USB device drivers which include libusb, the device driver for Digispark boards.
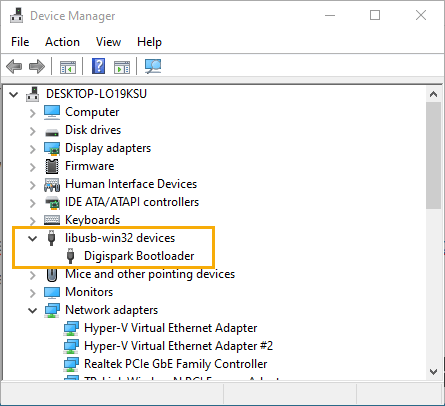
After successfully installing the device driver, you should see the libusb device driver when you open the Windows Device Manager. See Figure 2 above.
If the error “USB device not recognized” still appears when you plug in the Digispark board, proceed to solution 2.
Solution 2 – Install the Micronucleus Bootloader
In order to install the Micronucleus bootloader, you will need an ICSP (In-Circuit Serial Programmer) programmer. Examples of ICSP programmers are USBtinyISP, USBasp, and Arduino as ISP. Additionally, you will need to install ATtinyCore on the Arduino IDE. The following instructions assumes you have wired your Digispark board with an ICSP programmer and have already installed the ATtinyCore on the Arduino IDE.
For help on how to install ATtinyCore, please see How to Install ATTinyCore on Arduino IDE.
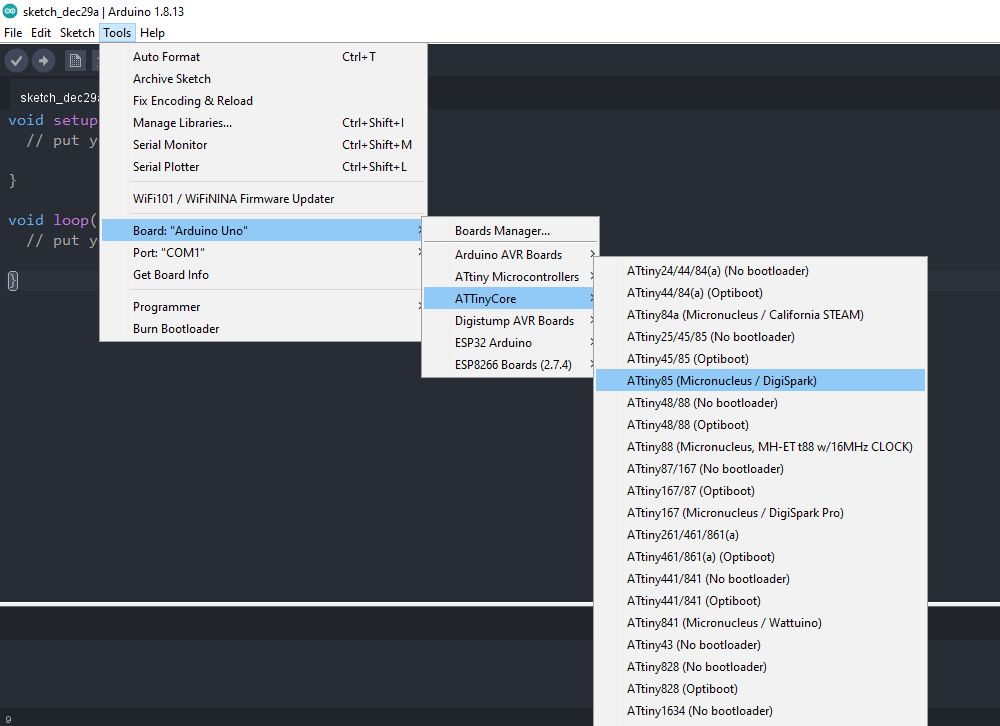
STEP 1 – SELECT THE BOARD – ATtiny85(Micronucleus/Digispark)
Open the Arduino IDE and select the proper board: ATtiny85(Micronucleus/Digispark), see Figure 3 below.
STEP 2 – SELECT THE PROGRAMMER
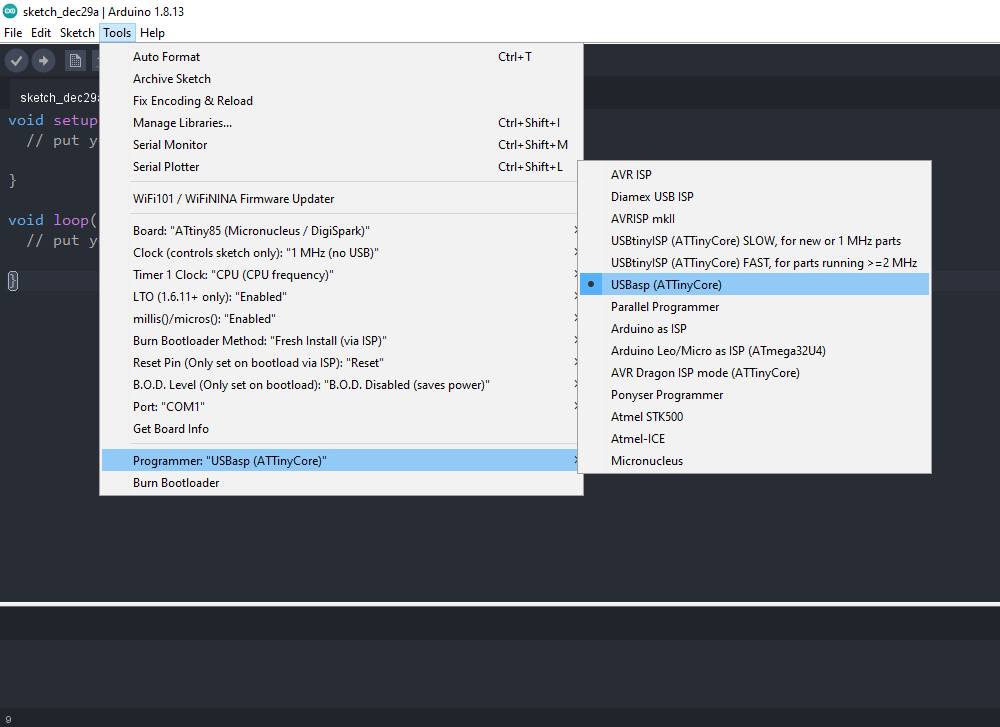
On the Arduino IDE main menu, go Tools -> Programmer and then select the ICSP programmer you are using. In my case, I am using a USBasp programmer, so I select USBasp(ATtinyCore).
STEP 3 – SELECT THE BURN BOOTLOADER METHOD
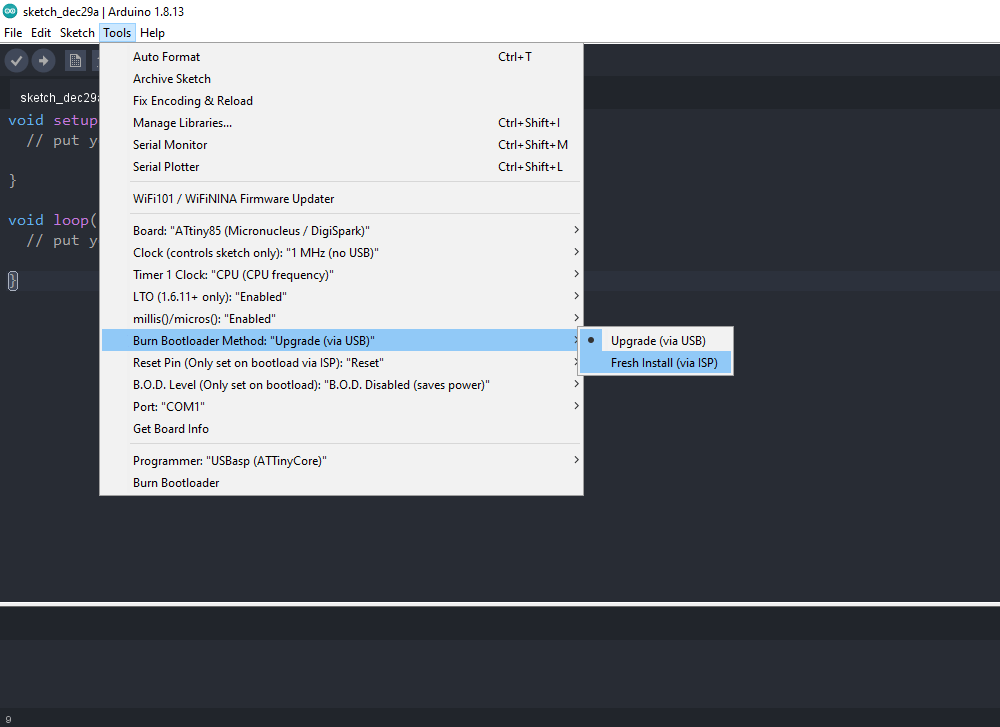
The next step is to select the Burn Bootloader method. We must select “Fresh Install (Via ISP)” because we are installing a new bootloader via the ICSP (ISP) programmer and not thru the USB interface. Please see illustration in Figure 5.
STEP 4 – SELECT BURN BOOTLOADER
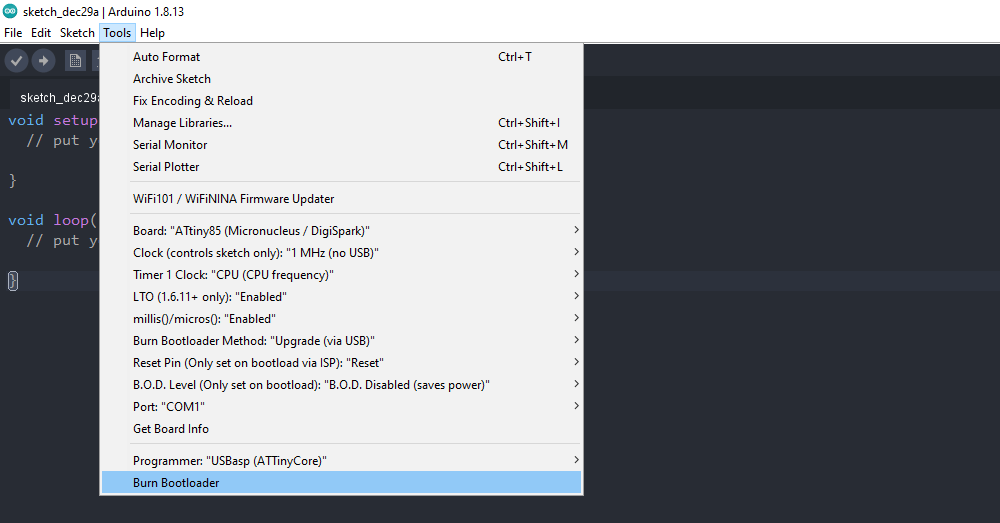
Finally, we start the bootloader installation by clicking on “Burn Bootloader”, see Figure 6. However, you may want to change other options prior to burning the bootloader. You may change the Clock, Timer1 Clock, LTO, millis()/micros(), and BOD as indicated on the menu. But do not change the “Reset Pin” which is currently set to “Reset”, unless you know what you are doing. Changing the “Reset Pin” to “GPIO” will disable ICSP programming. As a consequence, you will not be able to access the Digispark board again using an ICSP programmer. You will need a High-Voltage programmer to reprogram the ATtiny85’s fuses in order re-enable ICSP programming.
Final Notes on Digispark USB Device Not Recognized
It is very easy to fix the Windows error “USB device not recognized” that appears every time an ATtiny85 Digispark board is inserted on a USB port. The error is caused by either a missing Windows device driver or a missing Micronucleus bootloader. The solution is to install the Digispark Windows device driver and/or burn a new Micronucleus bootloader onto the ATtiny85.
References on Digispark USB Device Not Recognized
How to Install ATTinyCore on Arduino IDE
Digispark USB Development Board
