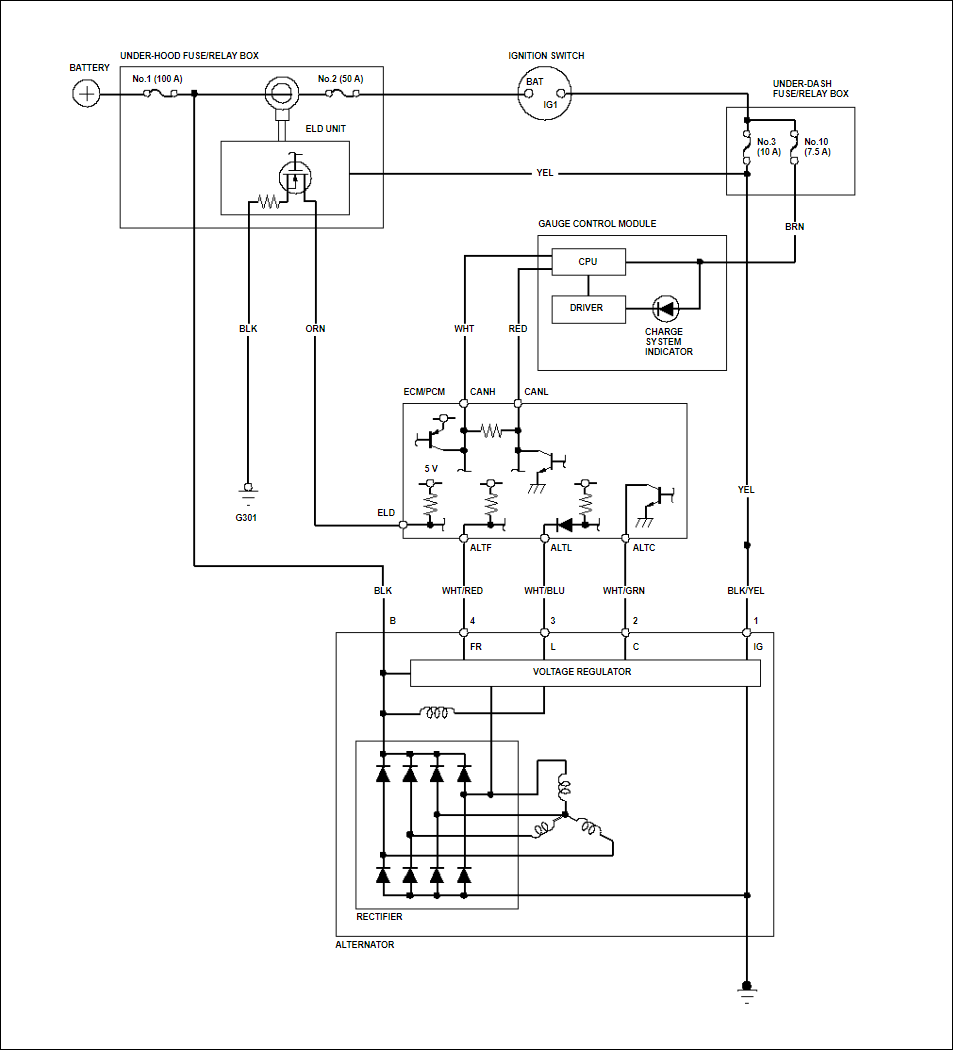
Honda Civic charging system wiring diagram for the Honda Civic 2006. This diagram applies to Honda Civic FD also known as Honda Civic Eight Generation or Honda Civic model years 2006-2011.
The main part of the Honda Civic charging system is the alternator. It generates an AC voltage in its field coils that is changed into a DC voltage by a set of rectifier diodes. The DC voltage is then fed to a voltage regulator that is controlled by the ECM/PCM (Engine Control Module/Powertrain Control Module) with the help of the ELD (Electrical Load Detector) unit. The ELD unit senses the amount of current being drained from the battery. The information from the ELD unit is then used by the ECM/PCM to alter the alternator field coil strength. This, in turn, adjusts the output voltage of the alternator to meet the current requirement of the battery and maintain the charging voltage.
For a complete list of available wiring diagrams, please see Honda Civic Wiring Diagram and Honda Civic 2006 Wiring Diagram
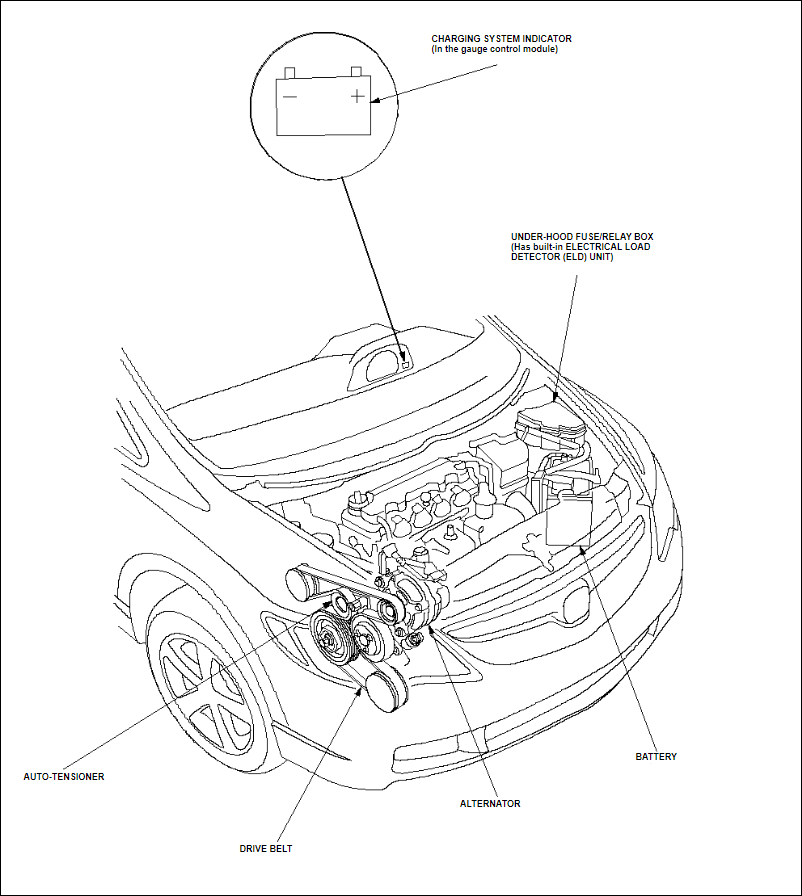
Honda Civic Charging System Component Location
Alternator Removal and Installation
Removal
One – Make sure you have the anti-theft code for the radio, or the navigation system, then write down the customer’s audio presets.
Two – Disconnect the negative cable from the battery first, then disconnect the positive cable.
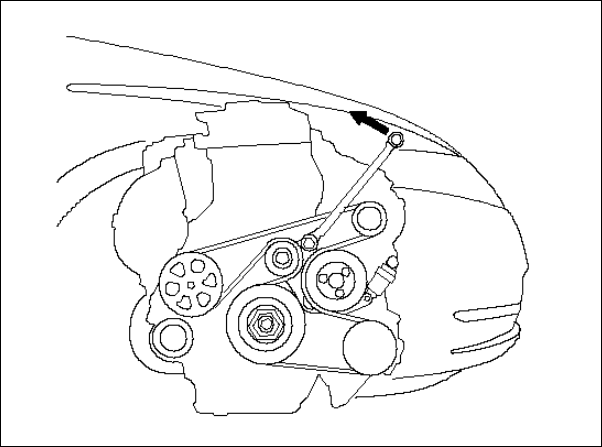
Three – Remove the drive belt. Set a wrench on the drive belt auto-tensioner from above the engine, and slowly turn the wrench in the direction shown, then remove the drive belt. NOTE: This is a hydraulic type auto-tensioner; you must turn the wrench slowly.
Four – Disconnect the alternator connector (A) and BLK wire (B) from the alternator.
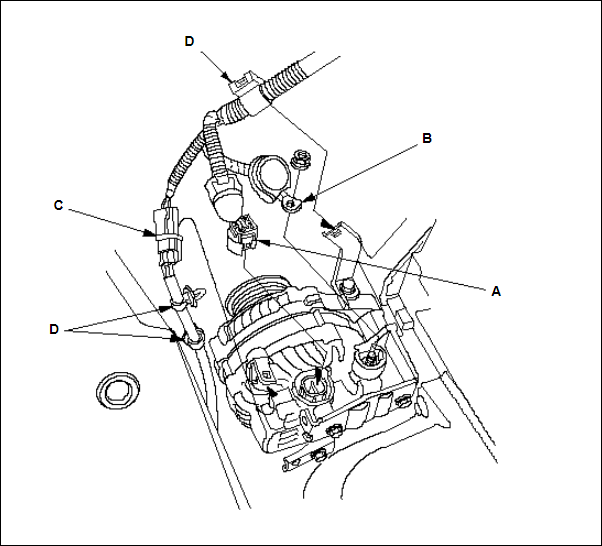
Five – Remove the harness connector (C) and harness clamps (D) from the alternator.
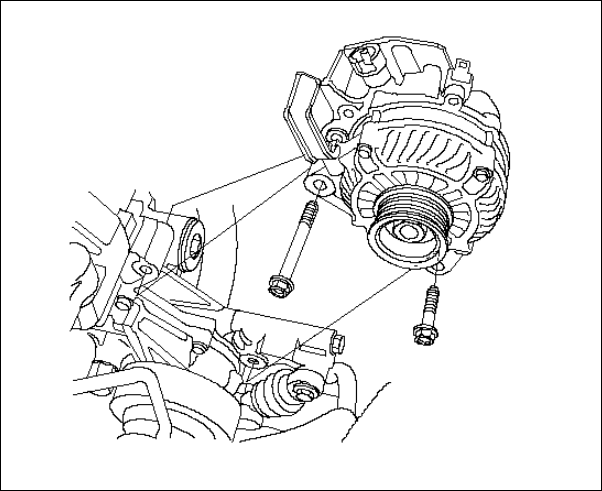
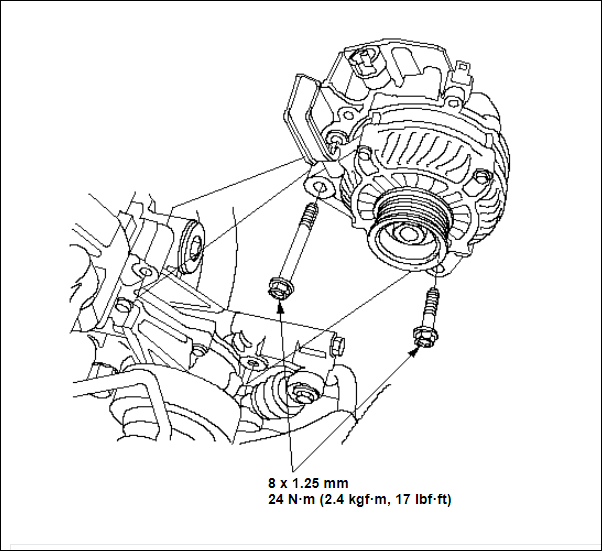
Six – Remove the alternator.
Installation
One – Install the alternator.
Two – Connect the alternator connector (A) and BLK wire (B) to the alternator.
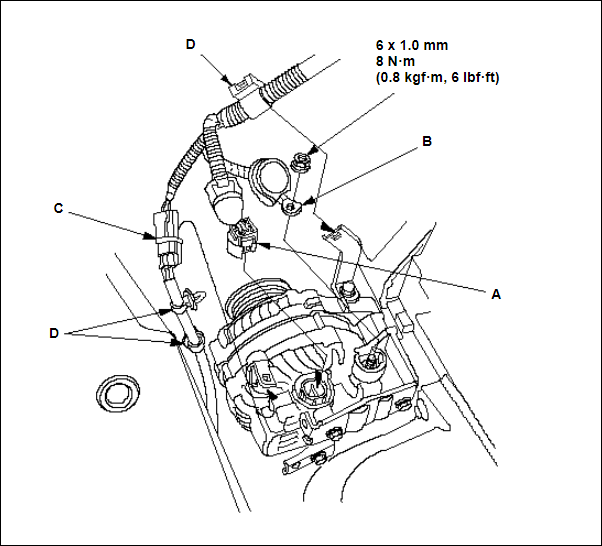
Three – Install the harness connector (C) and harness clamp (D) to the alternator.
Four – Install the drive belt. Install the new belt in the reverse order of removal.
Five – Connect the positive cable to the battery first, then connect the negative cable.
Six – Enter the anti-theft code for the radio or navigation system, then enter the customer’s audio presets.
Seven – Set the clock.
References on Honda Civic Charging System Wiring Diagram
Honda Civic Eight Generation on Wikipedia
Honda Civic Audio System Wiring Diagram – Audio Unit, Speaker System, Antenna Module, Radio Remote Switch, Cassette Player Unit, and the Auxiliary Jack Assembly
Honda Civic Brake Lights Wiring Diagram – Left Brake Light, Right Brake Light and Brake Pedal Position Switch
Honda Civic Climate Control Wiring Diagram – Cruise Control, HVAC (Heating, Ventilation, and Air Conditioning), Climate Control, and Rear Window Defogger
Honda Civic Exterior Lights Wiring Diagram – Headlights, Position Lights, Tail Lights, and License Plate Light
Honda Civic Gauge Control Wiring Diagram – Dash Lights Brightness Control, the A/T (Automatic Transmission) Gear Position Indicator, and the Gauge Control Module (Speedo)
Honda Civic Interior Lights Wiring Diagram – Ambient Light, Ceiling Light, Courtesy Lights, Glove Box Light, Map Light, Trunk Light and the Vanity Mirror Lights
Honda Civic Power Windows Wiring Diagram – Power Window Master Switch, Driver’s Window Control Unit, Front Passenger’s Window Switch, Left Rear Window Switch, Right Rear Window Switch, and their corresponding Window Motors
Honda Civic 2006 Security System Diagrams – Security Alarm System, Keyless Entry System (Central Locking System), and Power Door Locks System
Honda Civic Turn Signal/Hazard Flasher Circuit Diagram – Turn Signal Lights and Hazard Flasher Circuit Diagram
Honda Civic Windshield Wiper Wiring Diagram – MICU, Combination Light Switch, Turn Signal Switch, Hazard Warning Switch, Fog Light Switch, Windshield Wiper, Windshield Washer, and Headlight Washer