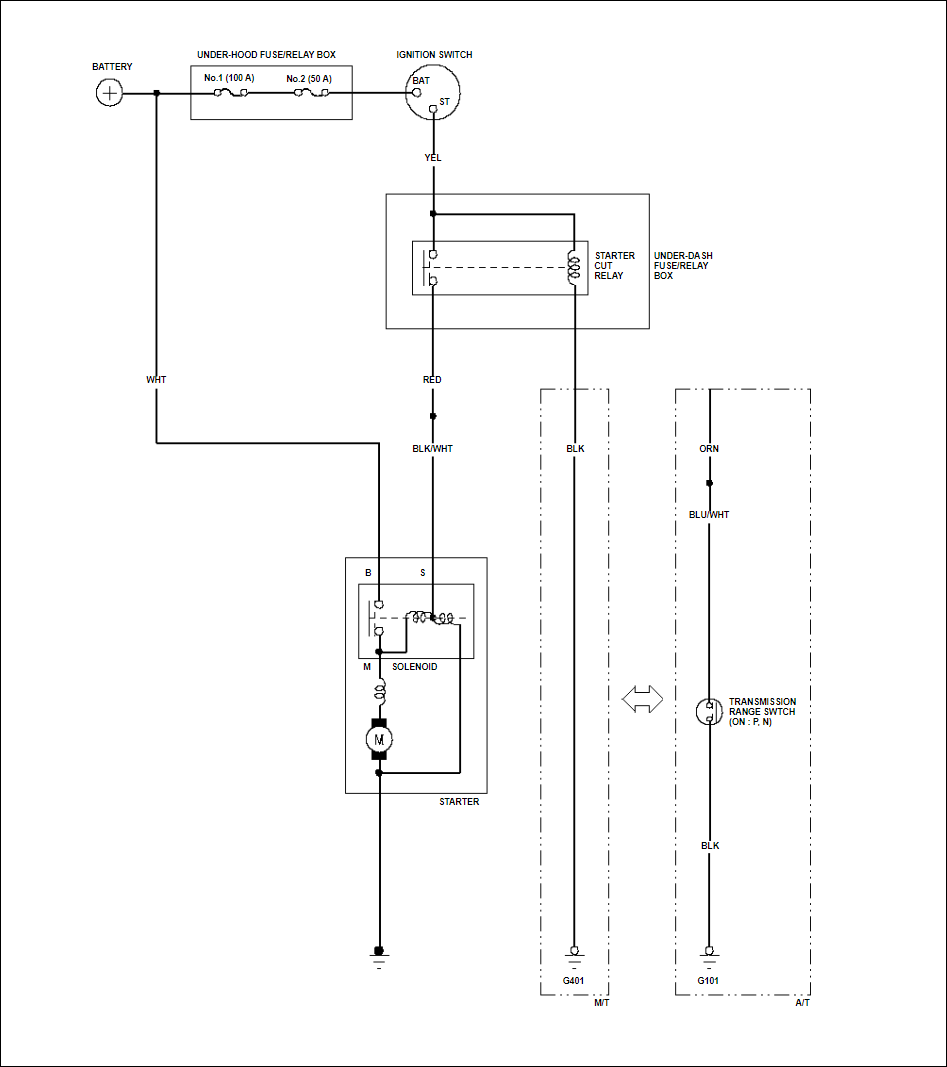
Honda Civic starting system wiring diagram for the Honda Civic 2006. This diagram applies to Honda Civic FD also known as Honda Civic Eight Generation or Honda Civic model years 2006-2011.
Starting System Description
The Honda Civic starting system is composed of the starter, the starter cut relay, the ignition switch, a 50-ampere fuse, a 100-ampere fuse, and the battery. Additionally, a transmission range switch is used on A/T (Automatic Transmission) models.
For a complete list of available wiring diagrams, please see Honda Civic Wiring Diagram and Honda Civic 2006 Wiring Diagram
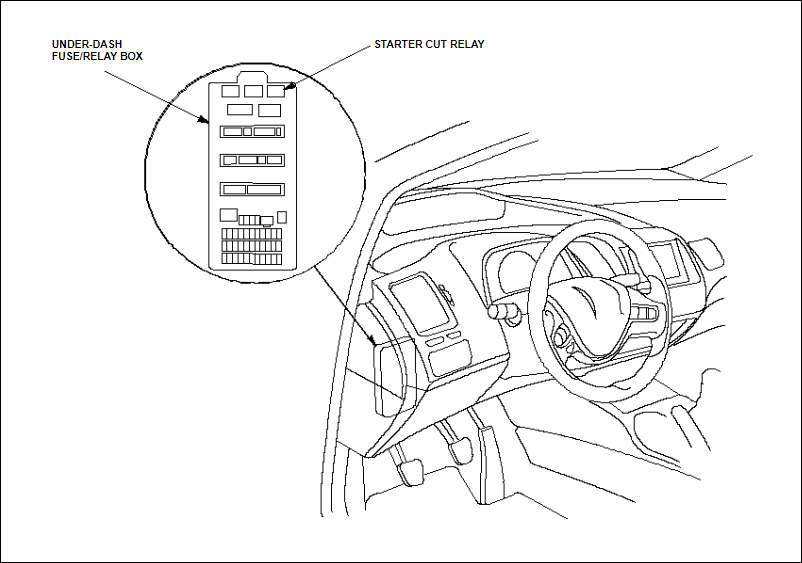
Honda Civic Starting System – Starter Cut Relay Location
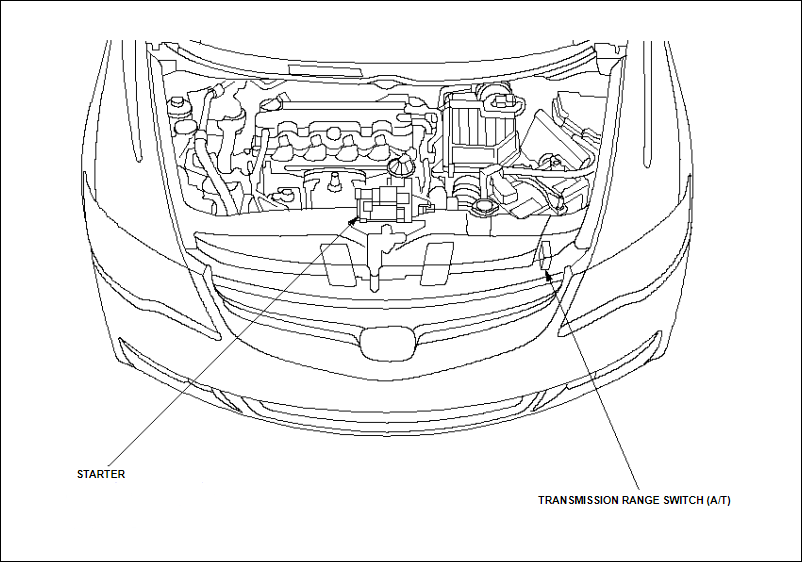
Honda Civic Starting System – Starter and Transmission Switch Location
Starter Removal and Installation
Removal
STEP 1 – Make sure you have the anti-theft code for the radio or the navigation system, then write down the customer’s audio presets.
STEP 2 – Disconnect the negative cable from the battery first, then disconnect the positive cable.
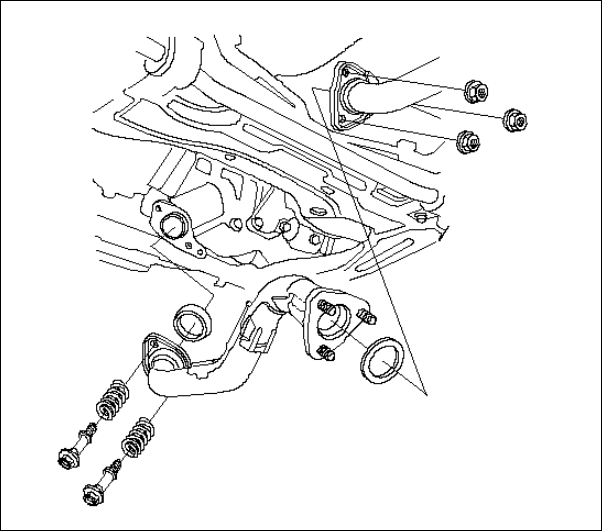
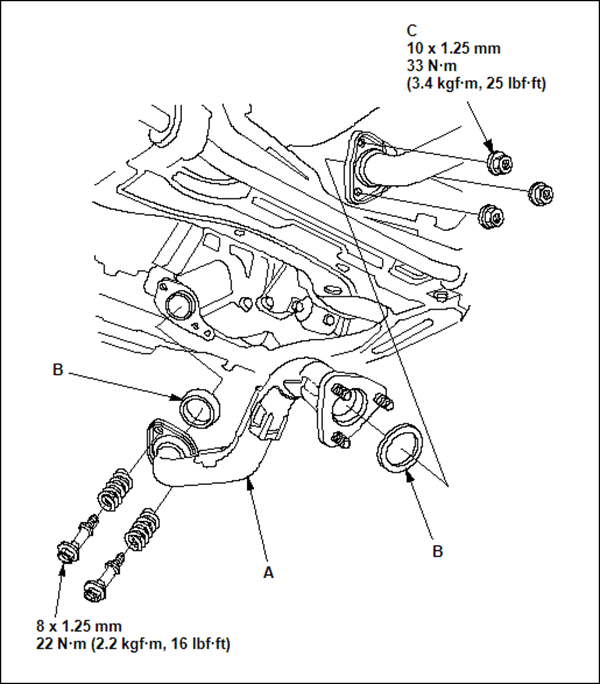
STEP 3 – Remove exhaust pipe A.
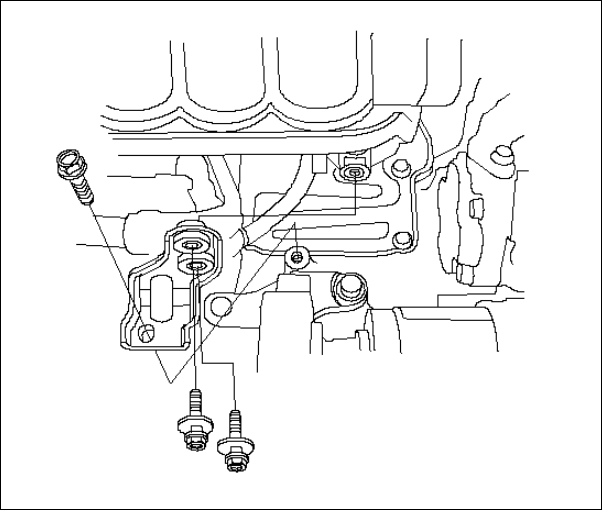
STEP 4 – Remove the intake manifold bracket.
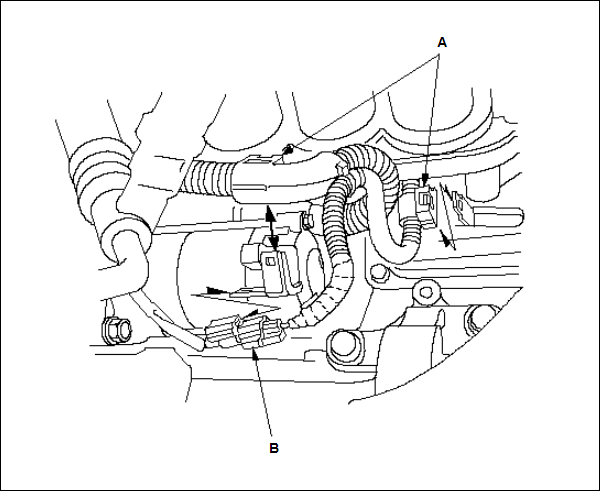
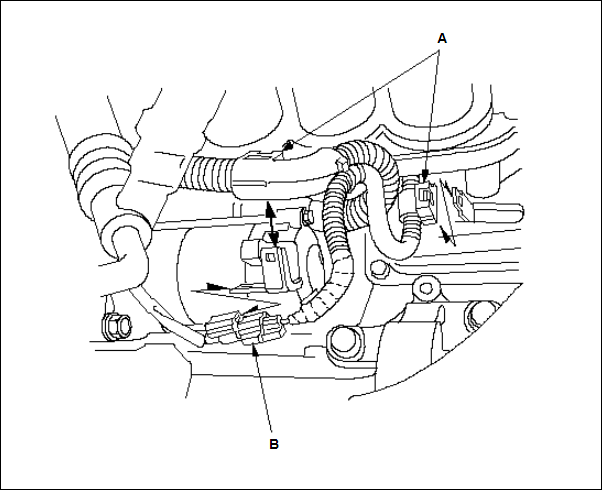
STEP 5 – Remove the harness clamps (A) and harness connector (B) from each clamp.
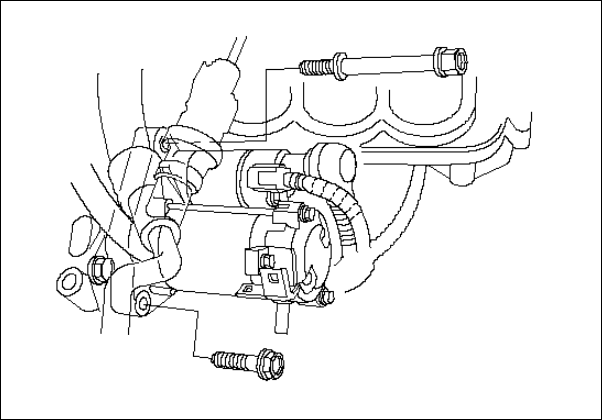
STEP 6 – Remove the two bolts securing the starter, then remove the starter from the engine.
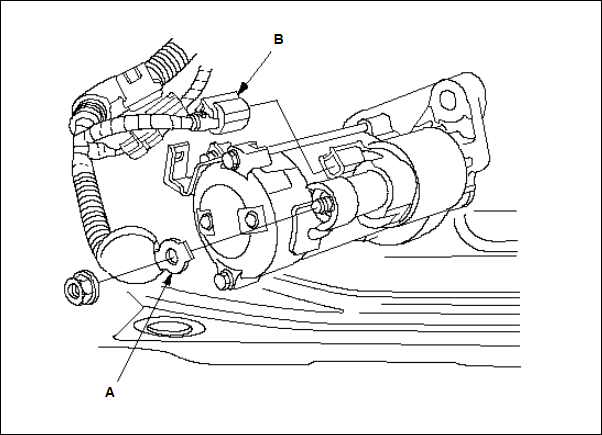
STEP 7 – Disconnect the starter cable (A) from the B terminal and disconnect the connector (B) from the S terminal, then remove the starter.
Installation
STEP 1 – Install the starter cable (A) and connector (B). Make sure the starter cable crimped side of the ring terminal is facing out.

STEP 2 – Install the starter, then loosely install the upper mounting bolt (A) and lower mounting bolt (B).
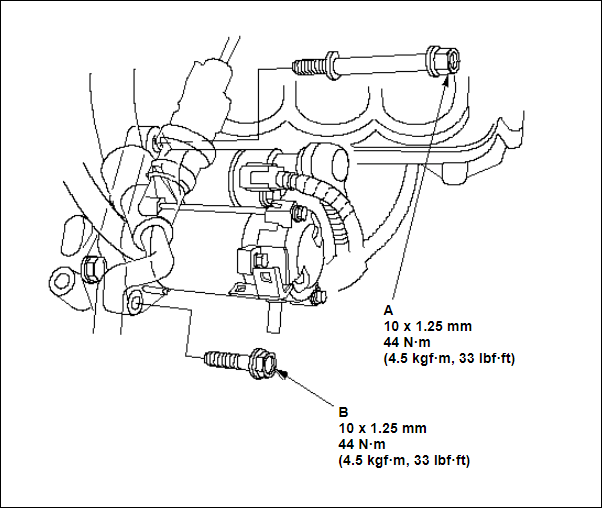
STEP 3 – Tighten the upper mounting bolt, then tighten the lower mounting bolt.
STEP 4 – Install the harness clamps (A) and harness connector (B) to each clamp.
STEP 5 – Install the intake manifold bracket.

STEP 6 – Install exhaust pipe A. Use new gaskets (B) and new self-locking nuts (C).
STEP 7 – Connect the positive cable to the battery first, then connect the negative cable.
STEP 8 – Start the engine to make sure the starter works properly.
STEP 9 – Enter the anti-theft code for the radio or navigation system, then enter the customer’s audio presets.
STEP 10 – Set the clock.
STEP 11 – Do the power window control unit reset procedure.
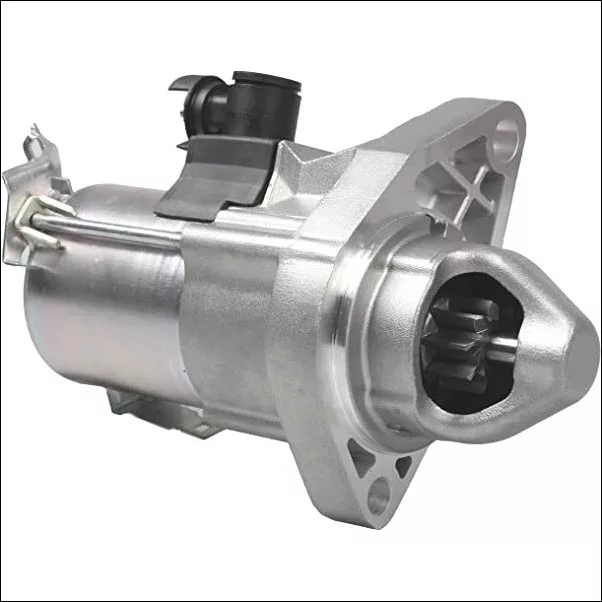
Honda Civic Starter
References on Honda Civic Starting System Wiring Diagram
Honda Civic Eight Generation on Wikipedia
Honda Civic Audio System Wiring Diagram – Audio Unit, Speaker System, Antenna Module, Radio Remote Switch, Cassette Player Unit, and the Auxiliary Jack Assembly
Honda Civic Brake Lights Wiring Diagram – Left Brake Light, Right Brake Light and Brake Pedal Position Switch
Honda Civic Climate Control Wiring Diagram – Cruise Control, HVAC (Heating, Ventilation, and Air Conditioning), Climate Control, and Rear Window Defogger
Honda Civic Exterior Lights Wiring Diagram – Headlights, Position Lights, Tail Lights, and License Plate Light
Honda Civic Gauge Control Wiring Diagram – Dash Lights Brightness Control, the A/T (Automatic Transmission) Gear Position Indicator, and the Gauge Control Module (Speedo)
Honda Civic Interior Lights Wiring Diagram – Ambient Light, Ceiling Light, Courtesy Lights, Glove Box Light, Map Light, Trunk Light and the Vanity Mirror Lights
Honda Civic Power Windows Wiring Diagram – Power Window Master Switch, Driver’s Window Control Unit, Front Passenger’s Window Switch, Left Rear Window Switch, Right Rear Window Switch, and their corresponding Window Motors
Honda Civic 2006 Security System Diagrams – Security Alarm System, Keyless Entry System (Central Locking System), and Power Door Locks System
Honda Civic Turn Signal/Hazard Flasher Circuit Diagram – Turn Signal Lights and Hazard Flasher Circuit Diagram
Honda Civic Windshield Wiper Wiring Diagram – MICU, Combination Light Switch, Turn Signal Switch, Hazard Warning Switch, Fog Light Switch, Windshield Wiper, Windshield Washer, and Headlight Washer