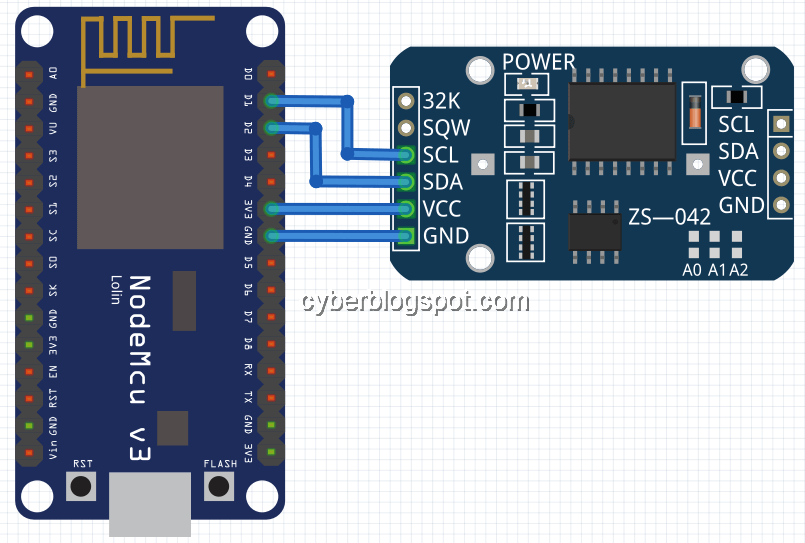
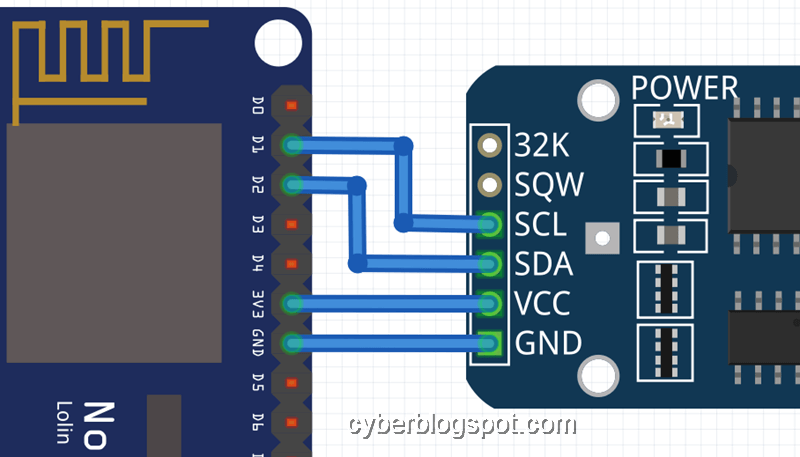
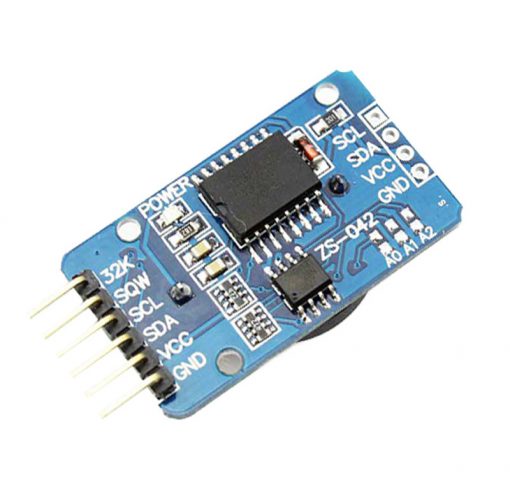
To connect a DS3231 RTC module to an ESP8266-based NodeMCU V3 development board, we use the I2C interface. The default I2C interface pins of NodeMCU V3 board are the pins D1 (SCL) and D2 (SDA).
1 2 3 4 5 | NodeMCU V3 --> DS3231 RTC D1 --> SCL D2 --> SDA 3V3 --> VCC GND --> GND |
You may consult the article NodeMCU V3 Pinout and Configuration to verify the pin layout of a NodeMCU V3 development board.


Programming with Arduino IDE
1 2 3 4 5 6 7 8 9 10 11 12 13 14 15 16 17 18 19 20 21 22 23 24 25 26 27 28 29 30 31 32 33 34 35 36 37 38 39 40 41 | // Arduino DS3232RTC Library // https://github.com/JChristensen/DS3232RTC // Copyright (C) 2019 by Jack Christensen and licensed under // GNU GPL v3.0, https://www.gnu.org/licenses/gpl.html // // Simple example sketch that should work on any architecture. // For the AVR architecture, instantiating the DS3232RTC object // is redundant, but this is only for testing purposes. // // Jack Christensen 24Sep2019 #include <DS3232RTC.h> // https://github.com/JChristensen/DS3232RTC DS3232RTC myRTC; void setup() { Serial.begin(115200); myRTC.begin(); } void loop() { display(); delay(10000); } // display time, date, temperature void display() { char buf[40]; time_t t = myRTC.get(); float celsius = myRTC.temperature() / 4.0; float fahrenheit = celsius * 9.0 / 5.0 + 32.0; sprintf(buf, "%.2d:%.2d:%.2d %.2d%s%d ", hour(t), minute(t), second(t), day(t), monthShortStr(month(t)), year(t)); Serial.print(buf); Serial.print(celsius); Serial.print("C "); Serial.print(fahrenheit); Serial.println("F"); } |
Related Articles on How to Connect a DS3231 to NodeMCU V3
Arduino Reference and Resources
How to Set up Arduino IDE for ESP8266 Programming
NodeMCU V3 ESP8266 Pinout and Configuration
How to Test NodeMCU V3 Using Esptool
How to Install Arduino IDE on Windows 10
How to Save and Restore ESP8266 and ESP32 Firmware
NodeMCU ESP-32S Pin Configuration
References on How to Connect a DS3231 to NodeMCU V3
NodeMCU on Wikipedia
Maxim DS3231 RTC
