File Explorer is an essential component of Windows that allows users to navigate, view, and manage files and folders stored on their computer. While the default File Explorer provided by Windows is functional, it may lack certain features or customizations that users require. In this article, we will explore how to create a custom File Explorer in VB.NET, a versatile and powerful programming language that enables developers to build feature-rich applications.
To create a custom File Explorer in VB.NET, we will make use of the “vbUtilities” class library. This third-party library provides a set of useful tools and functionalities that can simplify the development process and enhance the capabilities of our application. The library also includes pre-built user interface components that we can utilize to create a visually appealing and intuitive user interface. Using vbUtilities, we can save time and effort by avoiding the need to write custom code for these common functionalities and instead focus on the core business logic of our application.
You can download vbUtilities from github.com.
STEP 1 – Create a VB Project
Create a Windows Forms App (.NET Framework). Make sure that “.NET Framework 4.8” is selected under “Framework”. The vbUtilities is targetted for this specific .NET Framework version. Name the project as “Custom File Explorer”.

STEP 2 – Drop Controls on the Form
Drop a TreeView control, a ListView control, a ComboBox control, and three (3) ImageList controls. We may leave the names of the TreeView, ListView, and ComboBox controls with their default names (TreeView1, ListView1, and ComboBox1 respectively). However, because we have three (3) ImageList controls, it is best to rename them to avoid confusion.

The first ImageList will store the icons for the TreeView control. Therefore, we should rename it as ilTreeView. I renamed the second ImageList control as ilSmallIcons and the third ImageList as ilLargeIcons. These two last ImageList will hold the icons for the ListView control.
STEP 3 – Add a Reference to vbUtilities
Download and unzip the vbUtilities class library from github.com. Next, on the Visual Studio IDE, go to Project -> Add Reference. On the Reference Manager window, click the Browse button on the lower right of the window. Search for the vbUtilities.dll from the downloaded files and click the Add button. When you are back on the Reference Manager, click the OK button to close the Reference Manager window.
STEP 4 – Add Source Code
Double click on the form, delete the existing code, and copy and paste the following source code.
Imports vbUtilities
Public Class Form1
Private Sub Form1_Load(sender As Object, e As EventArgs) Handles MyBase.Load
vbUtilities.CustomFileExplorer.InitializeCFE("C:\", TreeView1, ilTreeView, ListView1, ilSmallIcons, ilLargeIcons, ComboBox1)
End Sub
Private Sub TreeView1_BeforeCollapse(sender As Object, e As TreeViewCancelEventArgs) Handles TreeView1.BeforeCollapse
vbUtilities.CustomFileExplorer.TreeView_BeforeCollapse(e)
End Sub
Private Sub TreeView1_BeforeExpand(sender As Object, e As TreeViewCancelEventArgs) Handles TreeView1.BeforeExpand
vbUtilities.CustomFileExplorer.TreeView_BeforeExpand(e, ilTreeView)
End Sub
Private Sub TreeView1_AfterSelect(sender As Object, e As TreeViewEventArgs) Handles TreeView1.AfterSelect
vbUtilities.CustomFileExplorer.TreeView_AfterSelect(e, ListView1, ilSmallIcons, ilLargeIcons)
End Sub
Private Sub ComboBox1_SelectedIndexChanged(sender As Object, e As EventArgs) Handles ComboBox1.SelectedIndexChanged
vbUtilities.CustomFileExplorer.ComboBox_SelectedIndexChanged(ComboBox1.SelectedItem, ListView1)
End Sub
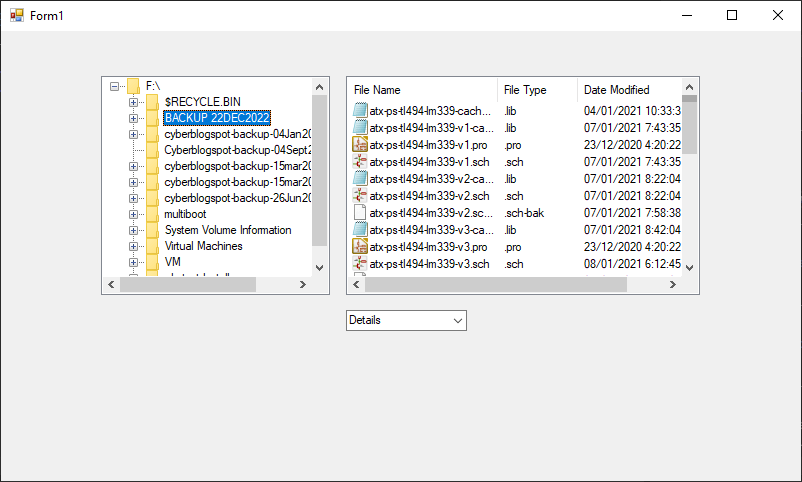
End ClassSTEP 5 – Compile and Run
Click the Start button on the Visual Studio IDE.