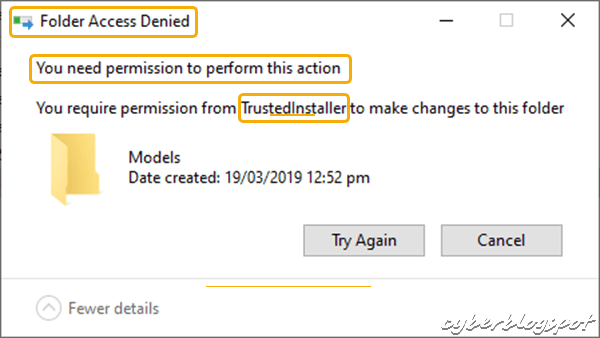
System and program installers sometimes leave behind unnecessary files. As a result, you lose precious disk space taken up by these files. Moreover, if you try to delete them, they simply refuse to be deleted. Therefore, I will show you how to delete these files left behind by System, TrustedInstaller, and others.
The reason why you cannot delete these files is two-fold. First, you do not own these files or directories. And second, you do not have the proper permissions. In other words, owning the files and directories and having explicit permissions are both needed. Later on, this should become clear as we go along with the example.
In the following example, we will be working with a folder or directory. This should show the concept and the necessary procedures. A similar procedure should work when it comes to deleting a single file.
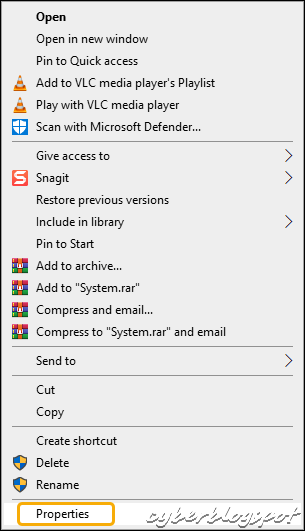
Step One – Open the folder’s Properties window
Open the folder’s Properties window. First, right-click on the folder. Then select Properties at the bottom of the context menu.
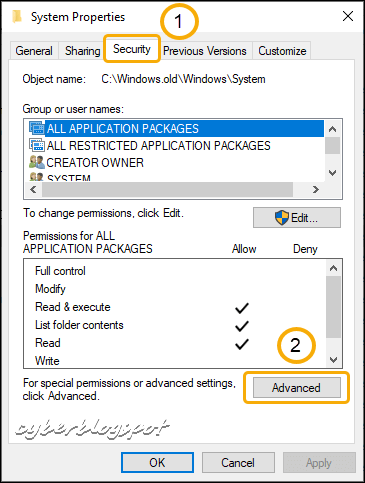
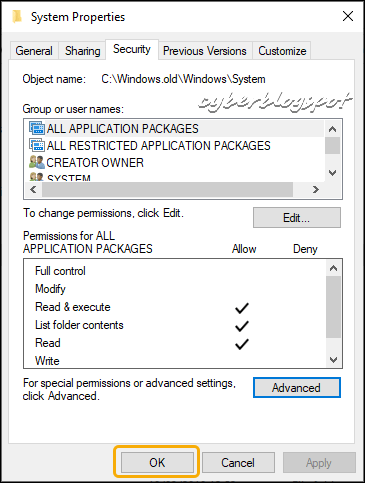
Step Two – Open the Advanced Security Properties
The screenshot below shows the folder’s Properties windows. First, click on the Security tab. Then, click on the Advanced button.
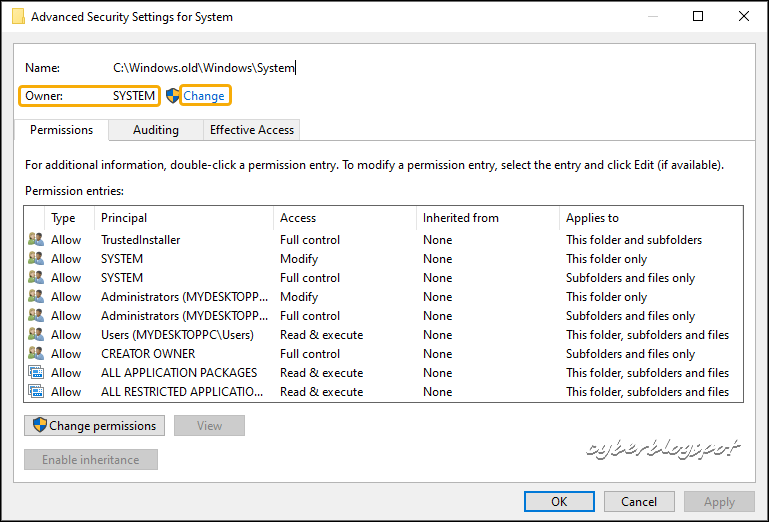
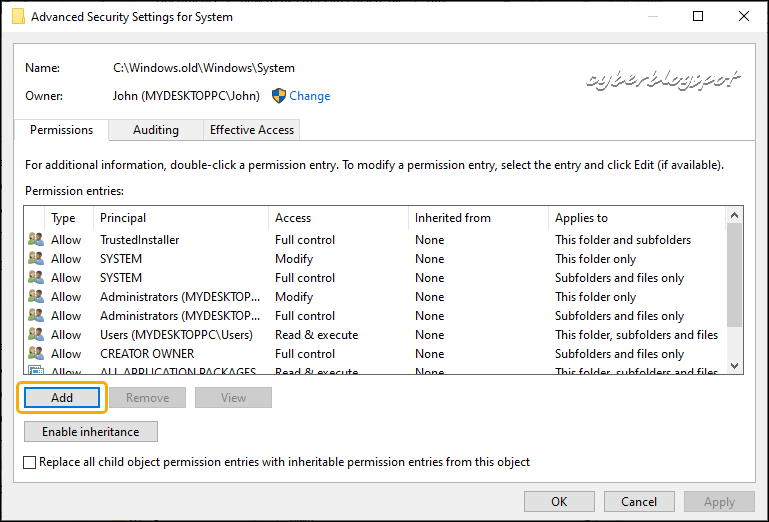
Step Three – Change the folder’s ownership
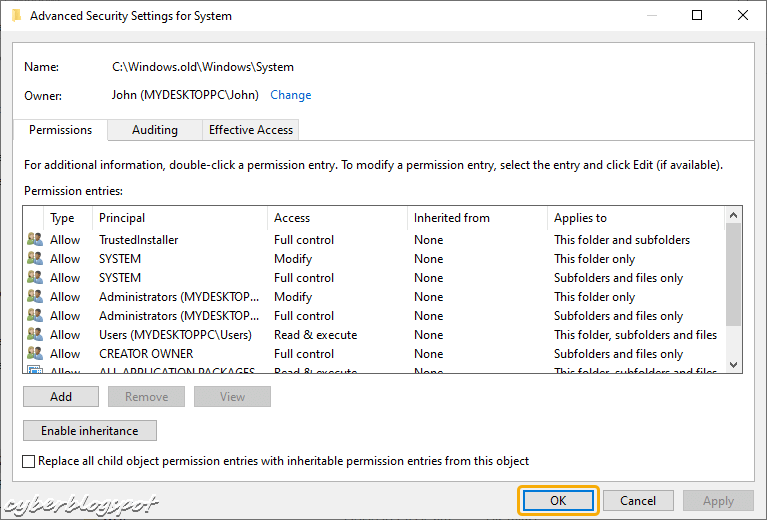
Please examine the image below. The Advanced Security Settings shows the folder is own by SYSTEM. This is the main reason that prevents us from deleting the folder. Therefore, we need to change the ownership of the folder.
Click on Change link. The link will open the Select User or Group window.
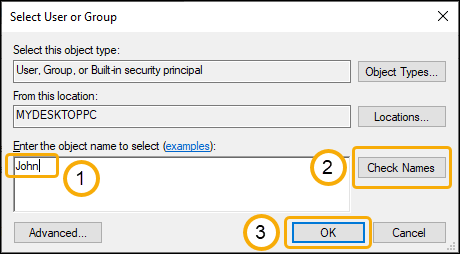
On the Select User or Group window, type your Windows username in the Enter the object name to select text box. Then, click on the Check Names button.

After clicking the Check Names button, it replaces the username with its full name. That is, it prefixes the username with the computer name. See the screenshot image below.
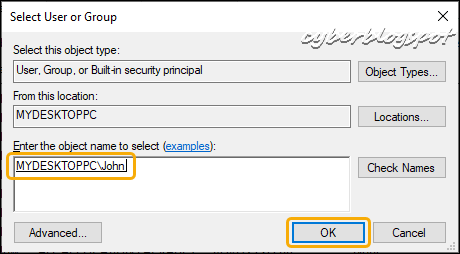
If Check Names successfully found the entered username, click the OK button.
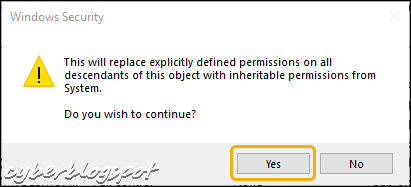
You will be back to the Advanced Security Settings window. Take note that the Owner field has been replaced. First, tick the Replace owner on subcontainers and objects. Next, also tick Replace all child object permission entries with inheritable permission entries from this object. Finally, click Apply button.

When a Windows Security message appears, click on the Yes button.
Another Windows Security message appears. This message is a reminder to close all the windows we have opened so far before making any permission changes. Click the OK button.
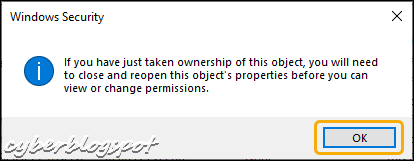
After clicking the OK button, the message window disappears. Now, we are back to the Windows Security Settings window. Again, click the OK button to close this window.
When the Advanced Security Settings window closes, we are back to the folder’s Properties window. Again, close the Properties window by clicking on the OK button.
Step Four – Change the folder’s permissions
In Step Three, we have taken ownership of the folder named system. Next, we need to change the folder’s permission settings.
First, open the folder’s Properties windows as was done in Step One. Then, open the Advanced Security Settings window as shown in Step Two above. On the Advanced Security Settings window, click the Add button.
After clicking the Add button, the Permission Entry window shows up. Click on the Select a principal link.

Step 4 Continuation
Clicking on the Select a principal link will open the Select User or Group window. As previously done in Step Three above, type your Windows username in the text box. Then, click on the Check Names button. Finally, click on the OK button to close the Select User or Group window.
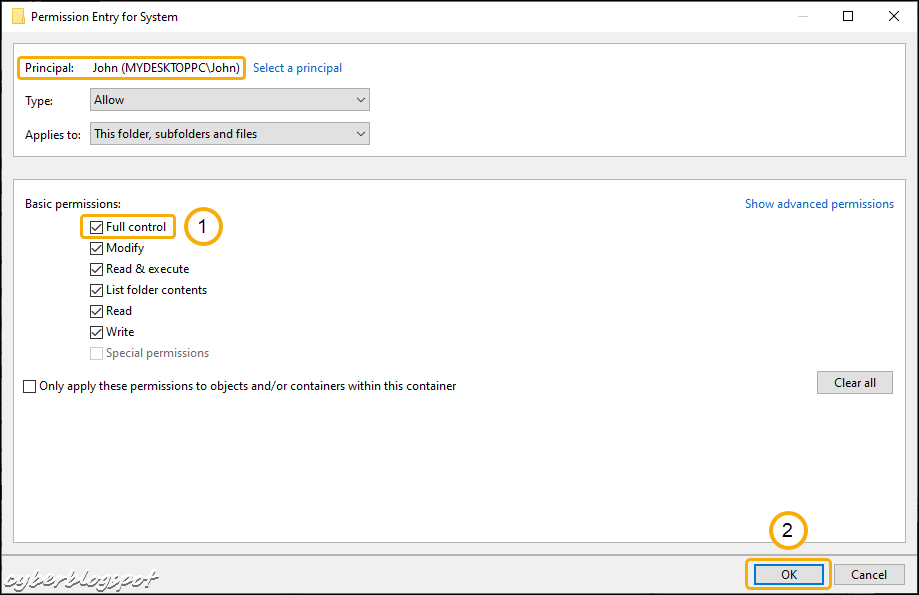
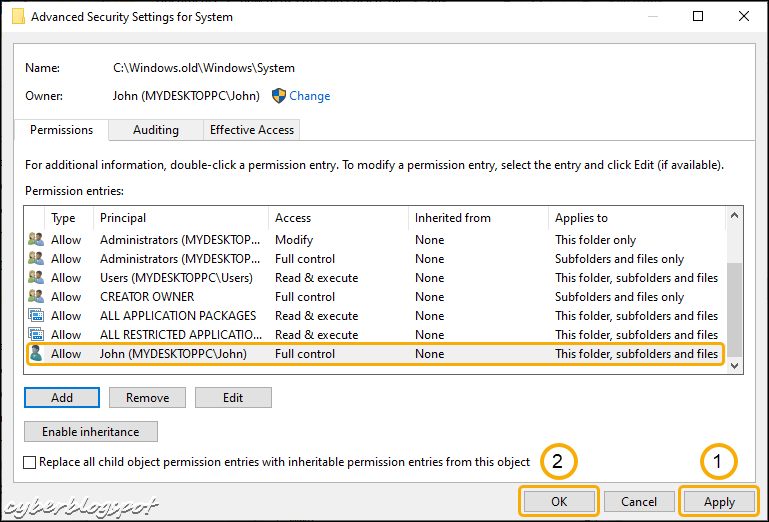
We are back to the Permission Entry window. Verify that the Principal field has been changed to your username. Then, place a check mark on Full Control. Ticking the Full Control permission will tick all the basic permissions, except the grayed Special permissions. Lastly, click on the OK button.
When the Permission Entry window closes, we are back to the Advanced Security Settings window. Confirm that your username is now listed in the Permission entries. Moreover, the permission Type, Access, and Applies to values must be Allow, Full Control, and This folder, subfolders, and files respectively. If everything is in order, click the Apply button. Then, click the OK button.
After clicking the OK button of the Advanced Security Settings window, the window should close and bring us back to the folder’s Properties window. Click the OK button on the Properties window. The Properties window closes, concluding the procedure for setting the folder’s permissions.
Now, after completing the procedures above, try deleting the folder. And hopefully, the folder gets deleted straight away like any other ordinary folder.
Summary on How to Delete Files by System and TrustedInstaller
To delete files and folders owned by the System, TrustedInstaller, and others, you must first take ownership of the files and folders. Then change the required permissions to Allow and Full Control.
Related Articles on How to Delete Files by System and TrustedInstaller
Default Username and Password of PLDT Routers 2019
Default Username and Password of Globe Router