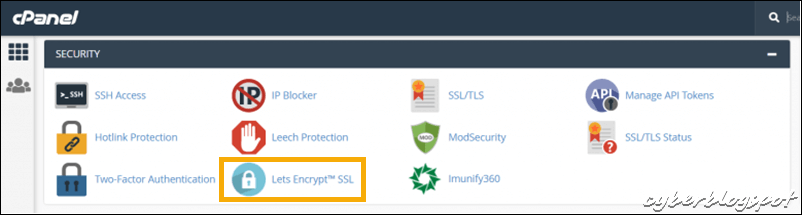
Introduction
An SSL certificate converts an HTTP website to a more secure HTTPS website. GoDaddy offers SSL certificates for an additional fee. That is, if you are on any of the shared web hosting plans. However, there is a way to get a free SSL certificate for your GoDaddy website.
One possible scenario is to use a free Let’s Encrypt SSL certificate. Lets Encrypt is a public service by the Internet Security Research Group (ISRG). It is a certificate authority that provides free SSL certificates for everyone’s use.
We can use Certbot, a Linux-based utility, to retrieve a free Let’s Encrypt certificate. Afterwards, we can install it in GoDaddy using the cPanel.
The following is a step by step guide to get a free SSL certificate for Godaddy.
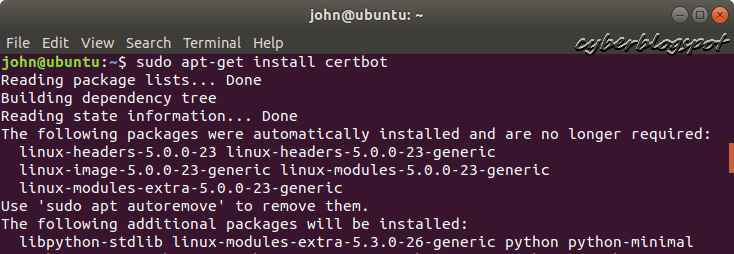
Step 1 – Install Certbot
Open a Linux terminal window. Type the command sudo apt-get install certbot, and then press the ENTER key. See the resulting screenshot below.
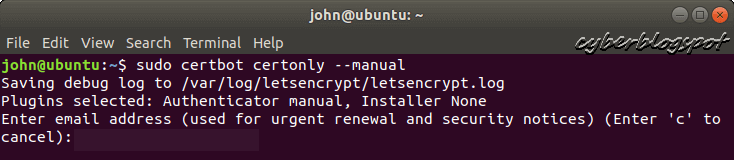
Step 2 – Start Certbot
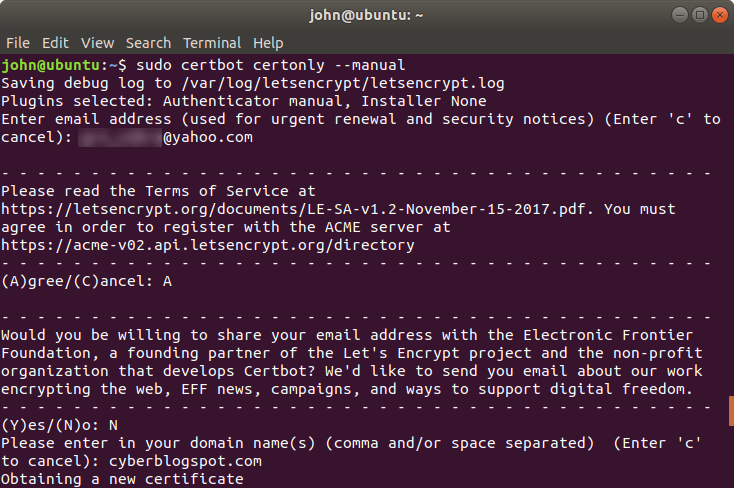
On the terminal prompt, type sudo certbot certonly –manual, and press the ENTER key.
Step 3 – Provide a valid e-mail address
Certbot will prompt you for an e-mail address. Provide a working e-mail address. Let’s Encrypt will send you a notice when the certificate is about to expire. As an example, I got an e-mail nineteen (19) days before my Let’s Encrypt certificate expired.
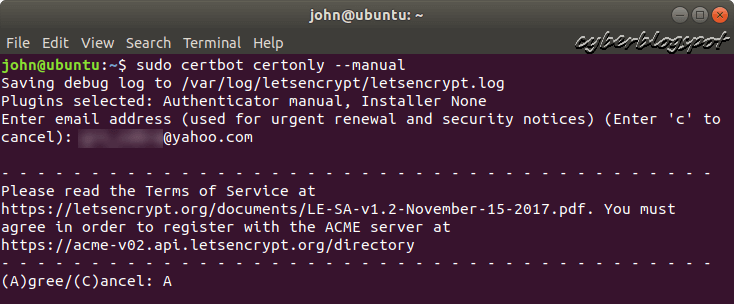
Step 4 – Agree to the Let’s Encrypt TOS
Agree to the Let’s Encrypt Terms of Service by pressing “A”. You may read the TOS at https://letsencrypt.org/documents/LE-SA-v1.2-November-15-2017.pdf.
Step 5 – Answer the question about sharing your email address
Next, Certbot asks you if you are willing to share your e-mail address with Electronic Frontier Foundation. EFF is the non-profit organization responsible for creating Certbot. The answer depends on you but for me it’s a No (N).

Step 6 – Provide the domain name(s) needing the free SSL certificate
Finally, Certbot asks you for your domain name. Note that if your website starts with “www.”, then include it here. Otherwise, do not prefix it with “www.”. As an example, this website’s canonical address is cyberblogspot.com, without “www.”. If I were to enter www.cyberblogspot.com, Certbot would accept it and it would create a certificate. But after installing the resulting certificate, I would get an error saying that the certificate does not match my website’s domain name. In short, the domain name www.cyberblogspot.com is entirely different from the domain name cyberblogspot.com.
After entering your domain name and pressing the ENTER key, you will be given a challenge. This challenge will prove if you really own the domain name that you provided. Please refer to the screenshot below.

The challenge consists of creating a file inside your website’s public_html folder. As shown in the screenshot below, I must create a file named 7GYKjGUTJ3EnWT2iW59JTUdrGL9LOg-j0qtU-S1po4w. This file must reside in public_html/.well-known/acme-challenge. Furthermore, this file must contain the following data: 7GYKjGUTJ3EnWT2iW59JTUdrGL9LOg-j0qtU-S1po4w._Z4xQCSLZcEte55G3Cgm3Dix_i08ZvdxCOW-XWOc_UY.
We will leave certbot for the meantime and return to it later after creating the acme challenge file. Do not close the Linux terminal where Certbot is running.
Step 7 – Create the ACME challenge file required to get a free SSL certificate
Let’s walk through the steps in creating the ACME (Automated Certificate Management Environment) challenge file.
Step 7A – Open the cPanel File Manager
First, open the cPanel login page in your internet browser. You can do this by typing your-domain-name/cpanel on the browser’s address bar. Or you may type, your-domain-name:2083 on the address bar. Then, once inside the cPanel, find the File Manager under the Files menu.
If you don’t know your cPanel credentials, log in to your GoDaddy web hosting account. Then, find the File Manager link on your My Hosting dashboard.

Before we create the challenge file, we need to go to the File Manager’s Settings. We want to enable the Show Hidden Files setting. As stated above, we need to create the challenge file inside the directory .well-known/acme-challenge. Since the .well-known directory starts with a dot, it is a hidden directory. Therefore, unless we enable the Show Hidden Files setting, we won’t see directory or folder we are creating. Moreover, any file that we create inside the hidden folder won’t be visible, too.
Step 7B – Enable the File Manager’s Show Hidden Files setting
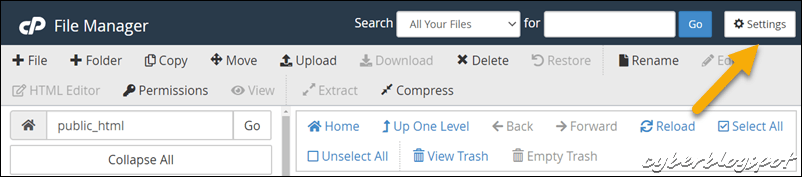
At the File Manager, click Settings the button.
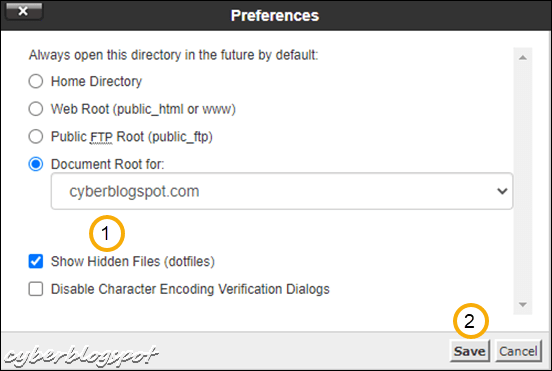
On the Preferences windows, click the Show Hidden Files (dotfiles) checkbox. Then, click on the Save button.
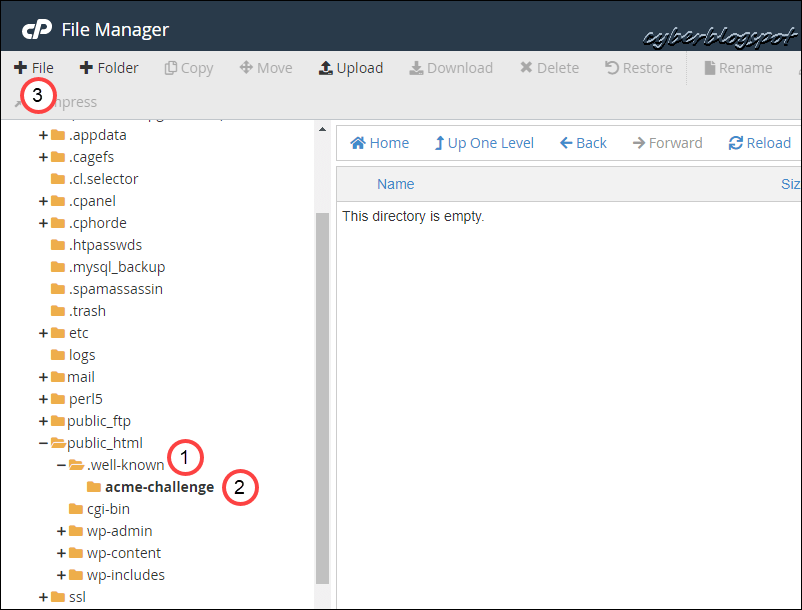
Step 7C – Create the .well-known folder or directory inside the public_html folder
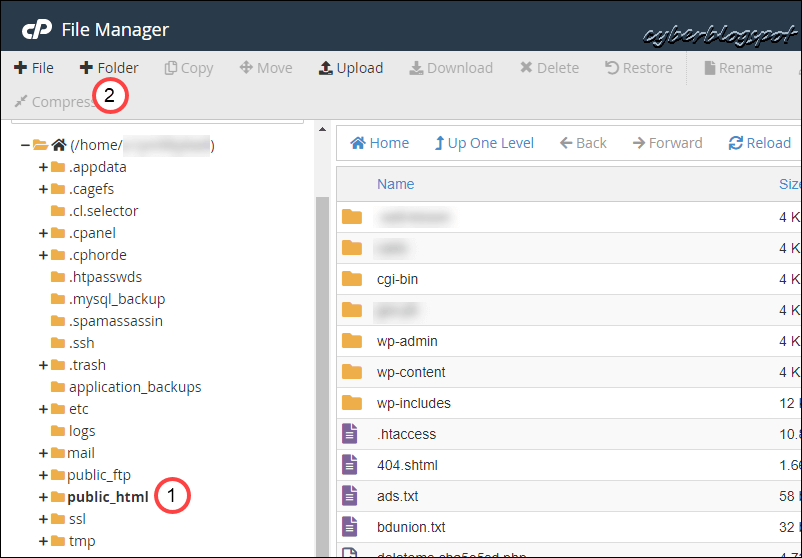
First click on public_html, and then press the Folder button.
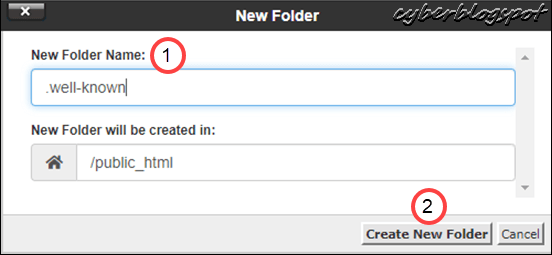
On the New Folder window, type the folder name .well-known on the New Folder Name textbox. Verify that below the input textbox, it says that the new folder will be created in /public_html. Then click Create New Folder button. The folder .well-known should now have been created under the folder /public_html.
Step 7D – Create the folder acme-challenge under .well-known folder
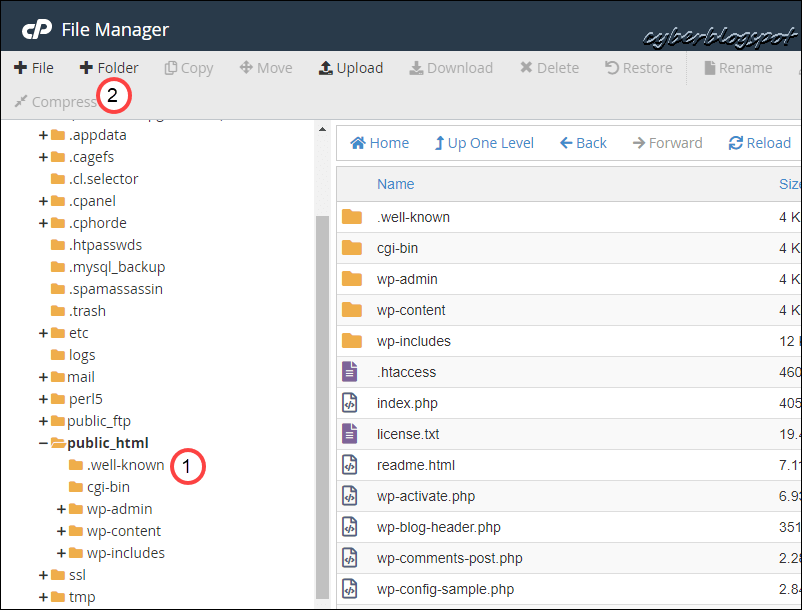
Click on the newly created .well-known folder, and click the Folder button again.
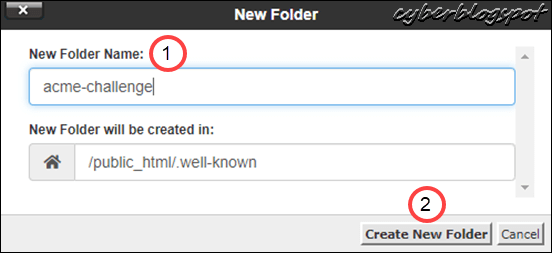
First, type the folder name acme-challenge on the New Folder Name textbox. Below the textbox should be the message: New Folder will be created in /public_html/.well-known. Then, click on the Create New Folder button once more. See the illustration above.
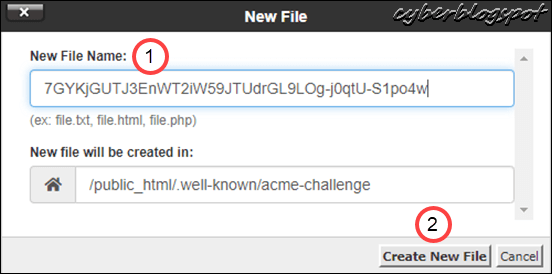
Step 7E – Create the challenge file
Now, we are ready to create the challenge file. First, click on the .well-known folder. Second, click on the acme-challenge folder. And finally, click on the File button.
In the New File window, we need to enter the acme-challenge filename. Since the filename is very long and consists of random alphanumeric characters, typing it is prone to errors. Therefore, it is better to copy and paste the link from the Linux terminal: your-domain-name/.well-known/acme-challenge/7GYKjGUTJ3EnWT2iW59JTUdrGL9LOg-j0qtU-S1po4w. Afterwards, delete the leading URL name: your-domain-name/.well-known/acme-challenge. That leaves you with just the needed filename. Then click the Create New File button.
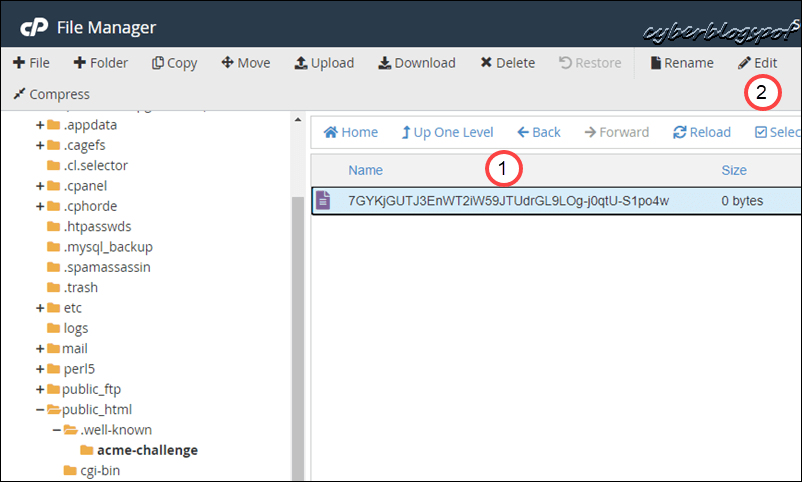
Step 7F – Place the challenge data into the challenge file
Now, the challenge file is already created. Notice that the file size is zero bytes. We need to edit the file and put the data that is needed for the acme-challenge. Click on the newly created file to select it, and then click on the Edit button.
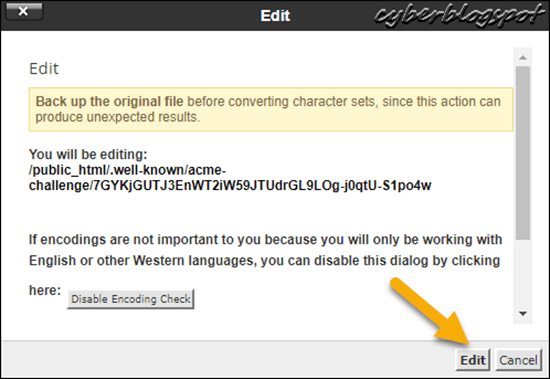
On the Edit window, click on the Edit button.

When the File Manager editor appears, copy and paste the challenge data from the Linux terminal. Then, click the Save Changes button, and finally, hit the Close button.
That completes the creation of the acme challenge file. Let’s go back to the Linux terminal with the Certbot program.
Step 8 – Let Certbot check the challenge file and retrieve your free SSL certificate for GoDaddy
Now that the acme challenge file has been created, we can go back to where we left off in Step 6. Open or switch to the Linux terminal running the Certbot program.
Press the ENTER key to let Certbot check the just created acme challenge file. If everything is OK, Certbot returns with a congratulatory message.
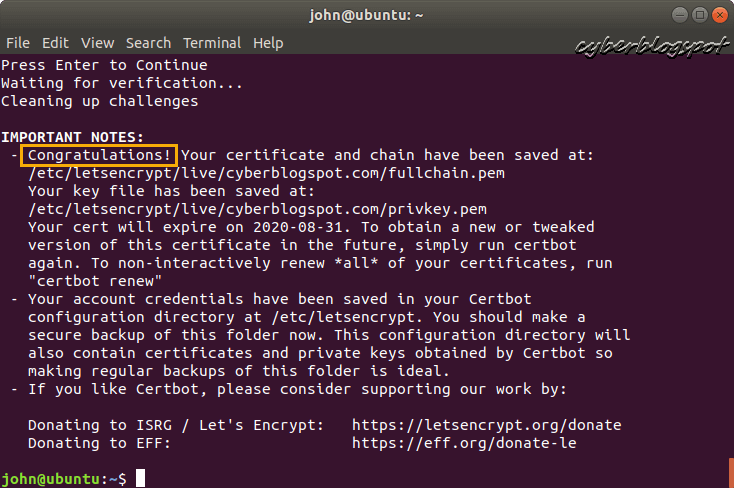
The Let’s Encrypt issued SSL certificate and its corresponding private key are located at /etc/letsencrypt/live/your-domain-name. The files are fullchain.pem for the certificate and privkey.pem for the private key file.
If you open the file fullchain.pem with a text editor, you should see something similar to this:
1 2 3 4 5 6 7 8 9 10 11 12 13 14 15 16 17 18 19 20 21 22 23 24 25 26 27 28 29 30 31 32 33 34 35 36 37 38 39 40 41 42 43 44 45 46 47 48 49 50 51 52 53 54 55 56 57 58 | -----BEGIN CERTIFICATE----- MIIFWzCCBEOgAwIBAgISBPdtQU8IWeA69uDi30ply5gbMA0GCSqGSIb3DQEBCwUA MEoxCzAJBgNVBAYTAlVTMRYwFAYDVQQKEw1MZXQncyBFbmNyeXB0MSMwIQYDVQQD ExpMZXQncyBFbmNyeXB0IEF1dGhvcml0eSBYMzAeFw0yMDA2MDIwNzExMjFaFw0y MDA4MzEwNzExMjFaMBwxGjAYBgNVBAMTEWN5YmVyYmxvZ3Nwb3QuY29tMIIBIjAN BgkqhkiG9w0BAQEFAAOCAQ8AMIIBCgKCAQEAzJAPvHDtU9O8b/qvUMrV481k7GSf XMWe1EqJvqvr9rpFKxQJQ0/5vG4n5Vr7j42WRARiSgMirDHDiTZu52AW6p4alVoV BKAqi91hJ+DSbKTA+A42haSeRVVWYieXQI01JbTsPQBYu0gRmSb8z9iUrZqW2R84 zUT6cLXkhbxQ86nkzi9Igi7sGhoNiKN5VOgWvRGs9rL1iXYwhP9TVUKHXnwPxWil 31wndBkknC4/spIVxU1X5z0Fha1Nkf8kYO6hvApilYgOR4JUnNPK+e5XfvbLCCuC FLIWZFEimhl0C3uViyEfTOWqdwCOLHO30AUGIH9sbIsr/I80by7TIS9zsQIDAQAB o4ICZzCCAmMwDgYDVR0PAQH/BAQDAgWgMB0GA1UdJQQWMBQGCCsGAQUFBwMBBggr BgEFBQcDAjAMBgNVHRMBAf8EAjAAMB0GA1UdDgQWBBSp+QU2+X+U0tjWAnWUFXBf lFe50DAfBgNVHSMEGDAWgBSoSmpjBH3duubRObemRWXv86jsoTBvBggrBgEFBQcB AQRjMGEwLgYIKwYBBQUHMAGGImh0dHA6Ly9vY3NwLmludC14My5sZXRzZW5jcnlw dC5vcmcwLwYIKwYBBQUHMAKGI2h0dHA6Ly9jZXJ0LmludC14My5sZXRzZW5jcnlw dC5vcmcvMBwGA1UdEQQVMBOCEWN5YmVyYmxvZ3Nwb3QuY29tMEwGA1UdIARFMEMw CAYGZ4EMAQIBMDcGCysGAQQBgt8TAQEBMCgwJgYIKwYBBQUHAgEWGmh0dHA6Ly9j cHMubGV0c2VuY3J5cHQub3JnMIIBBQYKKwYBBAHWeQIEAgSB9gSB8wDxAHcAXqdz +d9WwOe1Nkh90EngMnqRmgyEoRIShBh1loFxRVgAAAFydBXAuQAABAMASDBGAiEA pY2KzRm8ODlUfEe6WkKTDCgtkdRAmP/5jbq+XA2VUZsCIQCnIxMbXFH1AKJcuIBu ZUkw4hQAu/jzSgfHM8DeGCiKvgB2AAe3XBvlfWj/8bDGHSMVx7rmV3xXlLdq7rxh Ohpp06IcAAABcnQVwPYAAAQDAEcwRQIgOJRLyUQwzh6sKs7D8V5KX3Utxe3973go ZCBQQxR9VCYCIQDCGKpth5+OeJ7JTUTfULpcLU5ngo/o1RjkwP/M15ltFjANBgkq hkiG9w0BAQsFAAOCAQEAXlNBzjP3xw/RLH+6xyEH/+7tgD7AQ0UX76ZoqsRI+5+r C/LVmzty9ID/Bk0DnpsYQ3KBJ7a+Iq8/if+J4qqkvLaKPedYwzo4hCvs1PAe3y7E NTvQVAgOxhOOmLOwMLkkNhrnSqHhoY871adfV8mQ2NoNhDuZs1wDm6kP/YQbgyKO hWk9OA1xf1M1qzKq3BKXau7s+Hhot/SshZXSKmRqsl9CPNL4I6jgS7coc16JTqed WX0oZcL8oLIt6GBDcf9bjf1uzEqDqOW2LVhXz3cAapc/oe2jQZEIRi3aZOw6K0l9 0gUL/AfEdkVVMDgjSPbphoadZOy/Qy4MNJHDRk7JzA== -----END CERTIFICATE----- -----BEGIN CERTIFICATE----- MIIEkjCCA3qgAwIBAgIQCgFBQgAAAVOFc2oLheynCDANBgkqhkiG9w0BAQsFADA/ MSQwIgYDVQQKExtEaWdpdGFsIFNpZ25hdHVyZSBUcnVzdCBDby4xFzAVBgNVBAMT DkRTVCBSb290IENBIFgzMB4XDTE2MDMxNzE2NDA0NloXDTIxMDMxNzE2NDA0Nlow SjELMAkGA1UEBhMCVVMxFjAUBgNVBAoTDUxldCdzIEVuY3J5cHQxIzAhBgNVBAMT GkxldCdzIEVuY3J5cHQgQXV0aG9yaXR5IFgzMIIBIjANBgkqhkiG9w0BAQEFAAOC AQ8AMIIBCgKCAQEAnNMM8FrlLke3cl03g7NoYzDq1zUmGSXhvb418XCSL7e4S0EF q6meNQhY7LEqxGiHC6PjdeTm86dicbp5gWAf15Gan/PQeGdxyGkOlZHP/uaZ6WA8 SMx+yk13EiSdRxta67nsHjcAHJyse6cF6s5K671B5TaYucv9bTyWaN8jKkKQDIZ0 Z8h/pZq4UmEUEz9l6YKHy9v6Dlb2honzhT+Xhq+w3Brvaw2VFn3EK6BlspkENnWA a6xK8xuQSXgvopZPKiAlKQTGdMDQMc2PMTiVFrqoM7hD8bEfwzB/onkxEz0tNvjj /PIzark5McWvxI0NHWQWM6r6hCm21AvA2H3DkwIDAQABo4IBfTCCAXkwEgYDVR0T AQH/BAgwBgEB/wIBADAOBgNVHQ8BAf8EBAMCAYYwfwYIKwYBBQUHAQEEczBxMDIG CCsGAQUFBzABhiZodHRwOi8vaXNyZy50cnVzdGlkLm9jc3AuaWRlbnRydXN0LmNv bTA7BggrBgEFBQcwAoYvaHR0cDovL2FwcHMuaWRlbnRydXN0LmNvbS9yb290cy9k c3Ryb290Y2F4My5wN2MwHwYDVR0jBBgwFoAUxKexpHsscfrb4UuQdf/EFWCFiRAw VAYDVR0gBE0wSzAIBgZngQwBAgEwPwYLKwYBBAGC3xMBAQEwMDAuBggrBgEFBQcC ARYiaHR0cDovL2Nwcy5yb290LXgxLmxldHNlbmNyeXB0Lm9yZzA8BgNVHR8ENTAz MDGgL6AthitodHRwOi8vY3JsLmlkZW50cnVzdC5jb20vRFNUUk9PVENBWDNDUkwu Y3JsMB0GA1UdDgQWBBSoSmpjBH3duubRObemRWXv86jsoTANBgkqhkiG9w0BAQsF AAOCAQEA3TPXEfNjWDjdGBX7CVW+dla5cEilaUcne8IkCJLxWh9KEik3JHRRHGJo uM2VcGfl96S8TihRzZvoroed6ti6WqEBmtzw3Wodatg+VyOeph4EYpr/1wXKtx8/ wApIvJSwtmVi4MFU5aMqrSDE6ea73Mj2tcMyo5jMd6jmeWUHK8so/joWUoHOUgwu X4Po1QYz+3dszkDqMp4fklxBwXRsW10KXzPMTZ+sOPAveyxindmjkW8lGy+QsRlG PfZ+G6Z6h7mjem0Y+iWlkYcV4PIWL1iwBi8saCbGS5jN2p8M+X+Q7UNKEkROb3N6 KOqkqm57TH2H3eDJAkSnh6/DNFu0Qg== -----END CERTIFICATE----- |
Opening the privkey.pem will give you this:
1 2 3 4 5 6 7 8 9 10 11 12 13 14 15 16 17 18 19 20 21 22 23 24 25 26 27 | -----BEGIN PRIVATE KEY----- MIIEvwIBADANBgkqhkiG9w0BAQEFAASCBKkwggSlAgEAAoIBAQDMkA+8cO1T07xv +q9QytXjzWTsZJ9cxZ7USom+q+v2ukUrFAlDT/m8biflWvuPjZZEBGJKAyKsMcOJ Nm7nYBbqnhqVWhUEoCqL3WEn4NJspMD4DjaFpJ5FVVZiJ5dAjTUltOw9AFi7SBGZ JvzP2JStmpbZHzjNRPpwteSFvFDzqeTOL0iCLuwaGg2Io3lU6Ba9Eaz2svWJdjCE /1NVQodefA/FaKXfXCd0GSScLj+ykhXFTVfnPQWFrU2R/yRg7qG8CmKViA5HglSc 08r57ld+9ssIK4IUshZkUSKaGXQLe5WLIR9M5ap3AI4sc7fQBQYgf2xsiyv8jzRv LtMhL3OxAgMBAAECggEBAMkVG8LbJw/t5SAWRlue554kev688sJZKIX6N2kMyskf 1XpBGdHnPdByYBle1EYKohl+Tbf/WQf3awToUyByHlTG0c7aXCrN3sTZ+vUeVPqj AWVVY1b/uOzitCWMUWwM4p+MN2THgHGoqFPqNT2C4rO8cGhB/q4ZDi3ZPygPM2ww ZILdbtRdVh7eL01gNkO99z8p44bgHtARLbNI2OQSXpa6MbC7UajGjrfOtz8i8ZZF ISRkngaJ3RwmXfFOawggQe2FYG4ZwGgZg9aeyeOOIDkCgYEA88hS+YcRpfZxnRnE WDTdSpzIqzCyb7yjF8plquD0qcBpsCnA7t3oADe9tavuBY8Ps6B/4eZcgNKm8lRj nj7MqXqKY6lZ5Bd94dh4HwMgyP1y2NjdFEUa/fxu3wE/bd8h20ywlK25OoR8IwZ6 1Rsr8pHyYf4IpJVuSZNkPb4dDisCgYEA1tCOaEt4yeLBtj0S6tfgiTwSyyuhHO5K vZmVb+lV386AVbGWJCRFcn+ALcjgs7tqwp7jeC3S/gNjlxj0on0zXjjc/mkrUQ8X n+ozcvmAZKK7dzcIXXpP/HvlJQI7js+HGxA7tlAkpGCoONt0QTeSpQO9sjUenBdN oX5nlAzpc5MCgYBXFG2fOIIzWE7JIVUjdO6/IjYEAIccprNTYjbizSxYHqUiCigi qx2eRkr7xAhn7+xZ67ECjnjog1ajJUXYVvJgb6dTZkD32vRaYiq2WTWy1eXaU8zU 2sKDi1JHUnjH1HaRkVlaIpwRrRVypXPm/6e5JC0Cl+2abM5SddXOwEQ8tQKBgQCw sBBCJrmuTK4KiEeUFIZiOqA2rqcxVaryMm5hA2qX0JFsaspU5eSdXdP/VLfF/cS9 WdU9l2txdTYoJOWq9RIYUOss8zIm1SQYa5lv21rI67UIRKLDyIQb54g9nY2BVJ8L GpoSxe6tqbcUNSV1MxGSWvZfqyOHPf+jcoYdl1U5swKBgQDSqg1+4cDBQDmeg3mh XT9n5G8ypV5h29CanIIPp2AGa2pS7pLyCX53Zhus7/+fg0ZSM+d1IDmkL2Q6/jkU eF3PCIyQCOPpBLzjR2oDYmxWRdsb334Nfpk0uUbL9sJNVgkGTSknOymvnYsf5nF4 RTeAvL5x0+JQ7nY9ZzPHwKpdTg== -----END PRIVATE KEY----- |
Summary on How to Get a Free SSL Certificate for GoDaddy
In conclusion, to get a free SSL certificate for a Godady hosted website, install and run Certbot. Then, Certbot will ask you to place a challenge file in your website to prove that you are the owner of the site. If it finds the challenge file in its proper place, it retrieves a free certificate from Let’s Encrypt. However, the certificate is only valid for three (3) months.
THE NEXT STEP
Now, for the next step, see How to Install SSL Certificate in GoDaddy
Related Articles How to Get a Free SSL Certificate for GoDaddy
How to Install SSL Certificate in GoDaddy
How to Renew Let’s Encrypt SSL Certificate
Default Username and Password of PLDT Routers 2019
Default Username and Password of Globe Router
References on How to Get a Free SSL Certificate for GoDaddy
Let’s Encrypt – A service providing free SSL certificates. A project of the Internet Security Research Group.
Certbot – A Linux tool for acquiring and installing SSL certificates from Let’s Encrypt.
Electronic Frontier Foundation – Creator of Certbot.