In order to program an ATtiny microcontroller in Arduino IDE, we need to install the ATTinyCore Arduino core. The ATTinycore was written by Spence Konde. It supports almost the whole family of ATtiny AVR microcontrollers. The following ATtiny microcontrollers are supported:
- ATtiny1634
- ATtiny2313/4313
- ATtiny24/44/84
- ATtiny441/841
- ATtiny25/45/85
- ATtiny261/461/861
- ATtiny87/167
- ATtiny48/88
- ATTiny43
- ATtiny828
Additionally, the ATTinyCore supports programming via ICSP AVR programmers, Serial (Optiboot), and VUSB (Micronucleus).
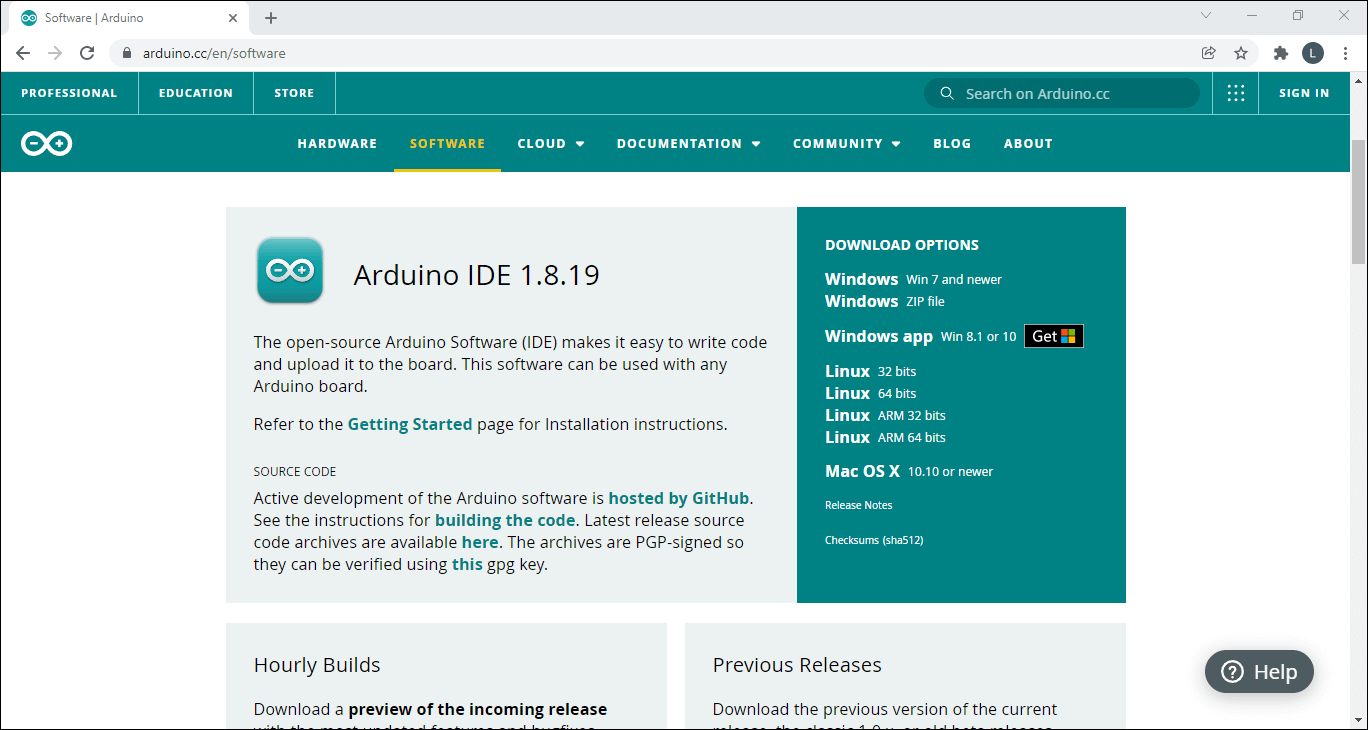
1. Install the Arduino IDE
If you don’t have the Arduino IDE (Integrated Development Environment) yet, you can download it here. As of this writing, the latest stable version is 1.8.19.
2. Add the ATTinyCore URL to the Board Manager
Open the Arduino IDE and on the main menu, select Files -> Preferences. In the Additional Boards Manager URLs textbox, type the URL “http://drazzy.com/package_drazzy.com_index.json“, and then press the OK button.
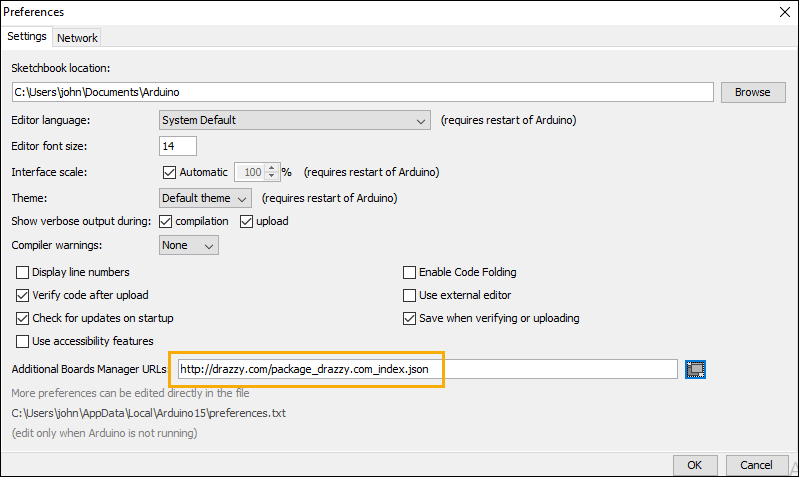
If the textbox already contains additional URLs, press the button on the right side of the textbox. A window will appear where you can type the URL on a new line.

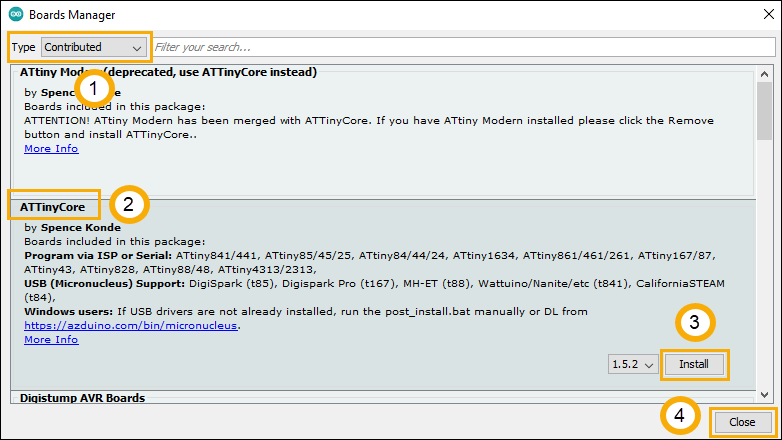
3. Install the Board
On the main menu, select Tools -> Board -> Board Manager.

When the Board Manager window appears, change the board Type from All to Contributed (1). Next, find and select the ATTinyCore board (2). Then, click the Install button (3). And finally, close the Board Manager window by clicking the Close button (4).
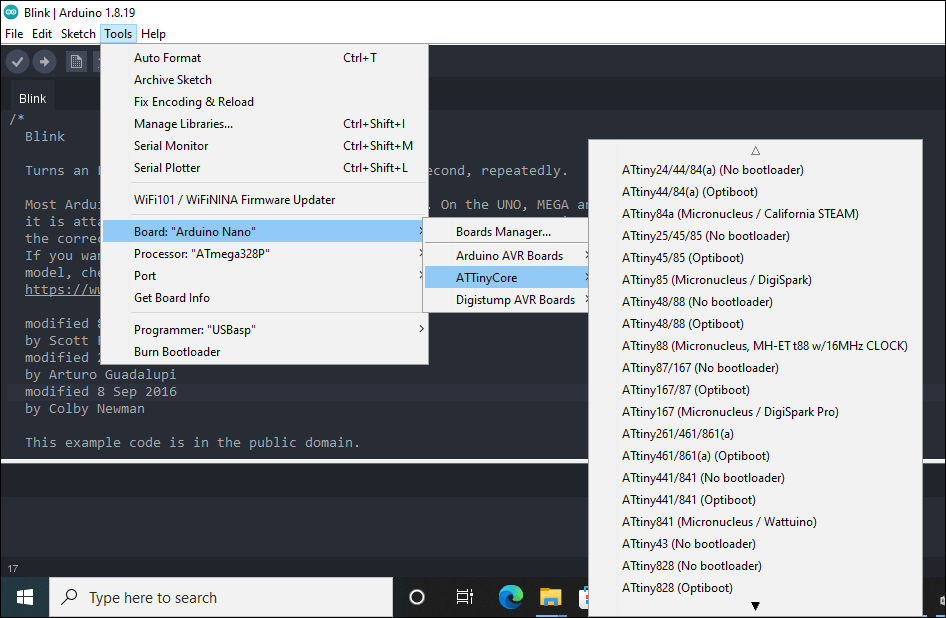
Select the Board
From the main menu, open Tools –> Board –> ATTinyCore and then select the appropriate ATtiny board for your microcontroller.
Note that in selecting a board, you will have to choose among No bootloader, Optiboot, and Micronucleus. First, choose No bootloader if you are programming with an AVR programmer. Second, select Optiboot if your ATtiny MCU has been previously burned with an Optiboot bootloader and it is wired as an Optiboot serial device. Finally, select Micronucleus if the MCU has been flushed with a Micronucleus bootloader and connected as a USB device. For more information about these three (3) programming modes, please see How to Program ATtiny85 in Arduino IDE.
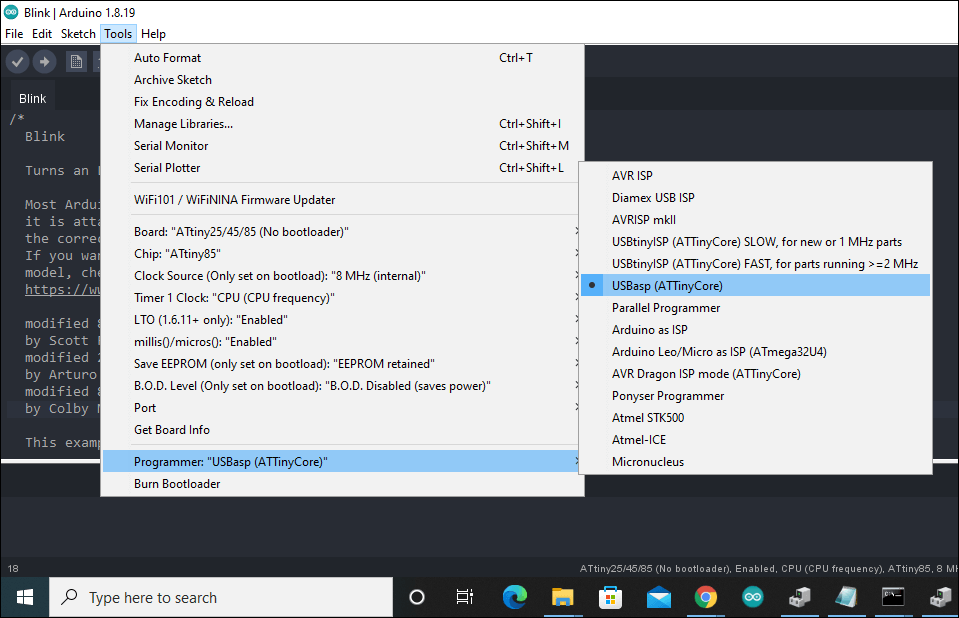
The next and final step depends on your chosen programming mode. If you select No bootloader, then you will need to choose a programmer. Open Tools –> Programmer and select the AVR programmer you are going to use. You may also have to specify the Port if your AVR programmer uses the serial port. Although most AVR programmers like the USBasp and USBtinyISP are USB devices and you won’t have to specify the port.
If you choose Optiboot, you need to specify the serial port. Open Tools –> Port and select the port for your ATtiny microcontroller.
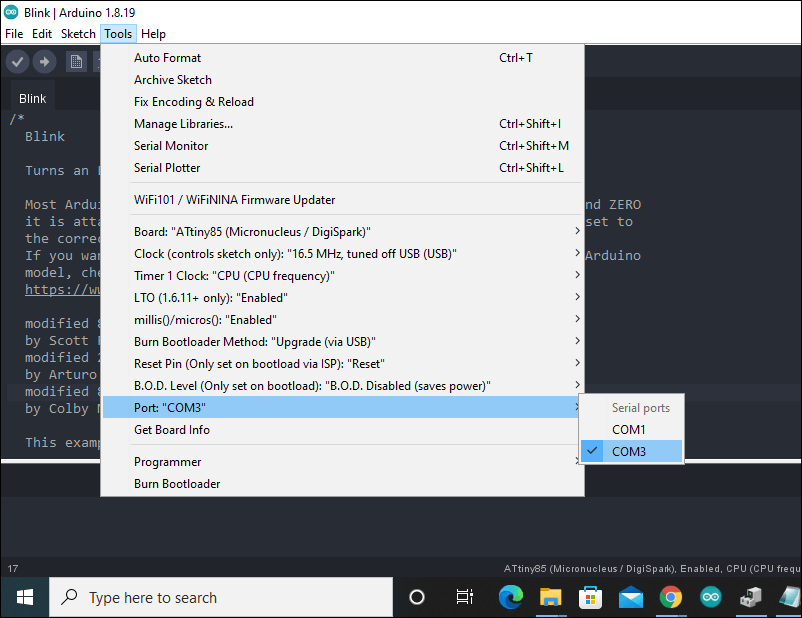
Finally, if you choose Micronucleus, you also don’t have to specify the port because Micronucleus uses a virtual USB device.
Now, you’re ready to start programming your ATtiny microcontroller!
References on How to Install ATTinyCore on Arduino IDE
How to Install Arduino IDE on Windows 10
How to Program ATtiny85 with Arduino IDE
Digispark USB Device Not Recognized
ATTinyCore – ATtiny Arduino core by Spence Konde
Thank you for adding the programmer portion.
When downloading ATTinycore into the 1.8.16 Arduino IDE I get http://drazzy.com/package_drazzy.com_index.json
Error downloading http://drazzy.com/package_drazzy.com_index.json
Error downloading http://drazzy.com/package_drazzy.com_index.json
Thank Gary