
VMware Tools incorporates many features that enhance the operation of VMware Workstation. For example, you can activate copy and pasting from documents on the host to the guest computer, or vice versa. Or you can create a shared folder to make files accessible from either the guest or the host machine. It is therefore prudent, if not necessary, to install VMware Tools in Arch Linux right after installing VMware Workstation.
In Arch Linux, VMware Tools does not install as easily as it does on Windows and other Linux distributions. One of the problem is the absence of “init directory” that the installer needs for it’s proper installation. A google search will point you the official Arch Linux website and a github vmware-tools-patches. Both articles are about making patches to make VMware Tools.
The procedure outlined below does not make any patches and only entails creating the systemd service file to start the VMware Tools service daemon.
Step 1 – Dowload VMware Tools
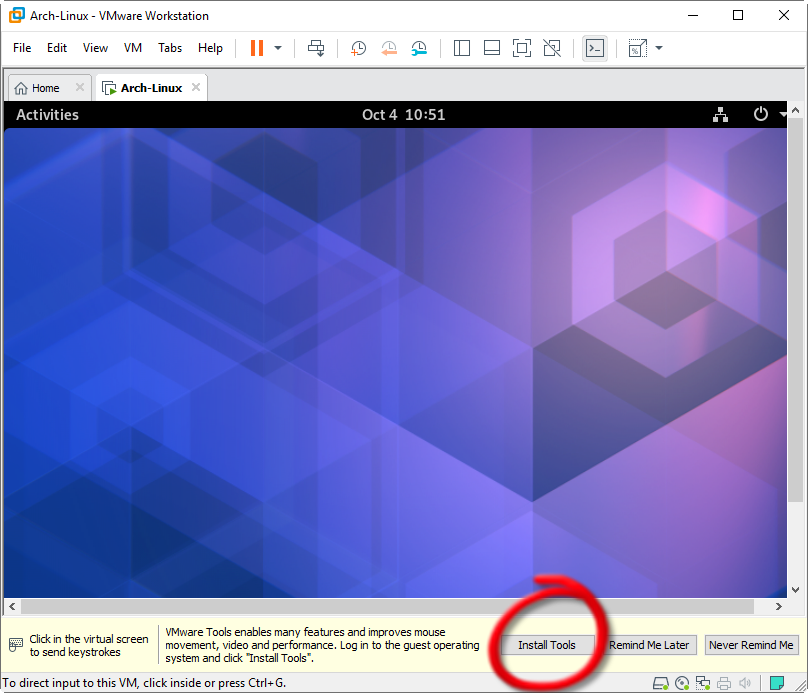
Download the VMware Tools package by clicking the “Install Tools” button at the bottom of the VMware Workstation’s window. You may also start the download process by using the menu at the top of the window by selecting VM/Install VMware Tools.
Step 2 – Unpack VMware Tools
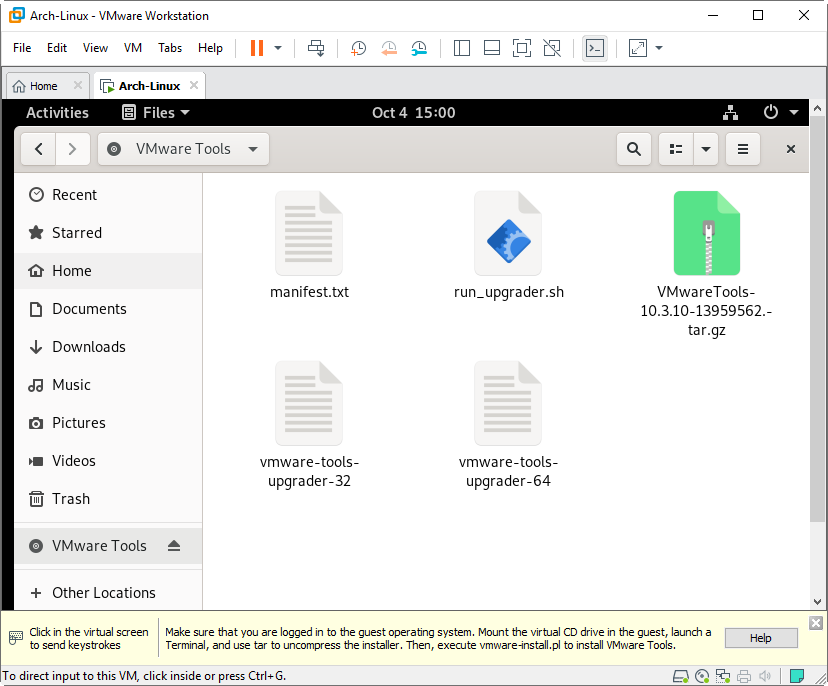
If the VMware Tools download in Step 1 was successful, the installer ISO image would be automatically mounted on the file system, as shown in the screenshot below. The installer is mounted at /run/media/root/’VMware Tools’.
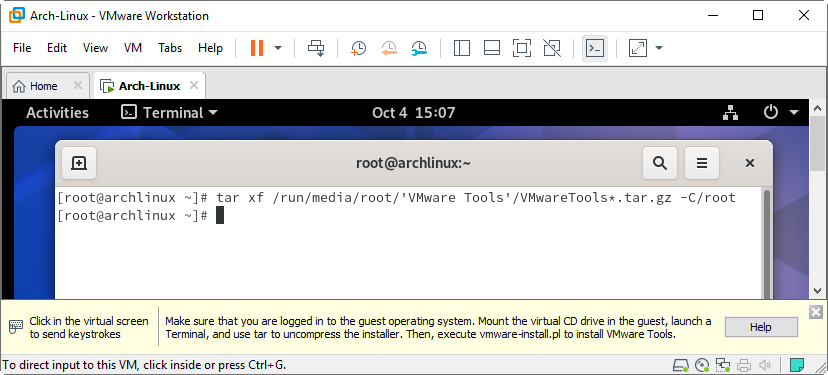
Let us unpack the compressed installer file to our home directory. Note that I am logged in as the user “root” and my home folder is “/root”.
# tar xf /run/media/root/'VMware Tools'/VMwareTools*.tar.gz -C /root
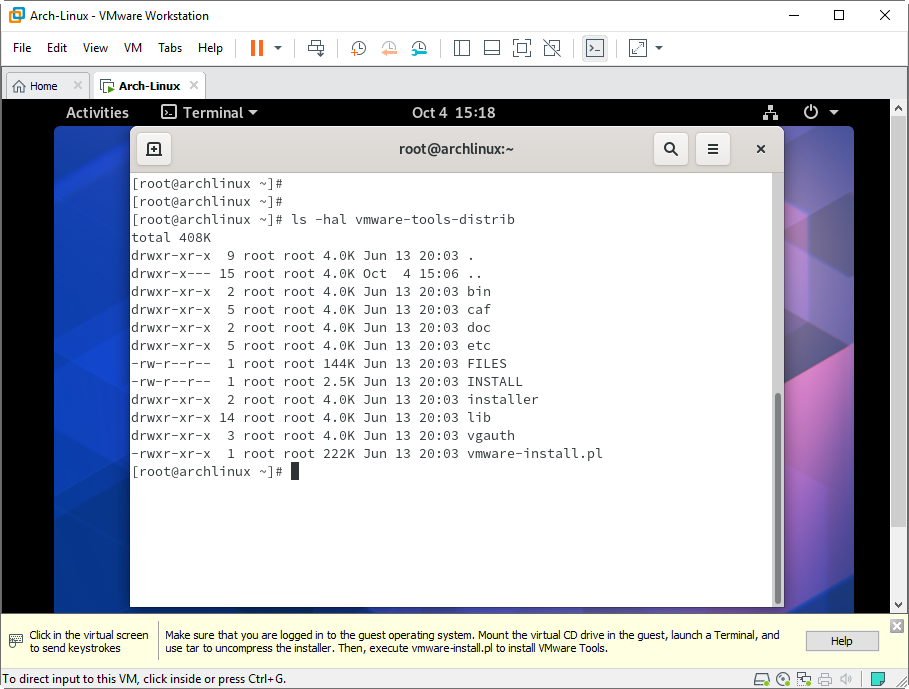
The uncompressed installer is now at my home directory as shown by the image below.
Step 3 – Create a Fake Init Directory
Before we run the installer, we need to create a fake init directory. The init directory is used by Linux distributions that use System V Init for initialization. Arch Linux does not use the System V Init but instead uses the new systemd initialization.
# for x in {0..6}; do mkdir -p /etc/init.d/rc${x}.d; done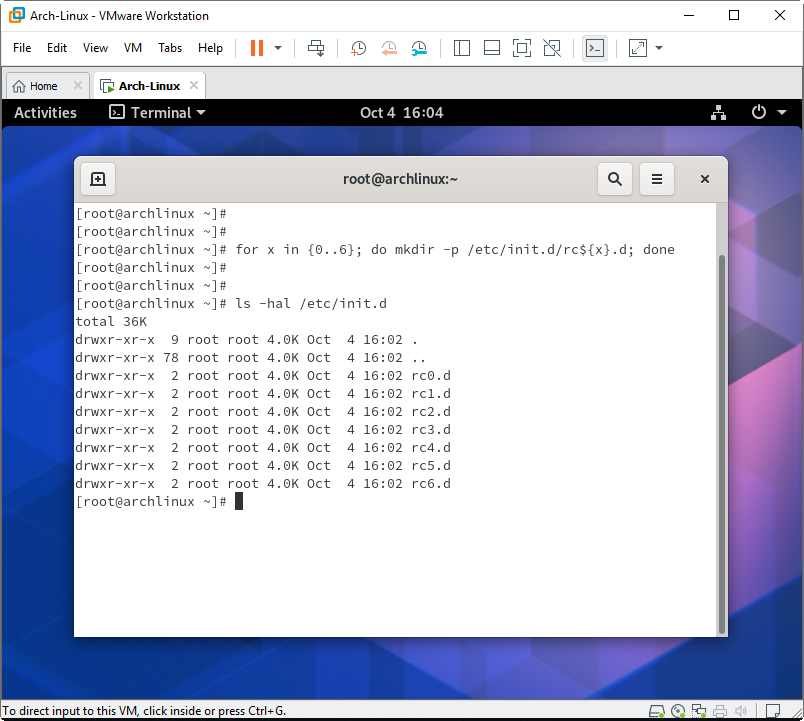
Step 4 – Run the VMware Installer
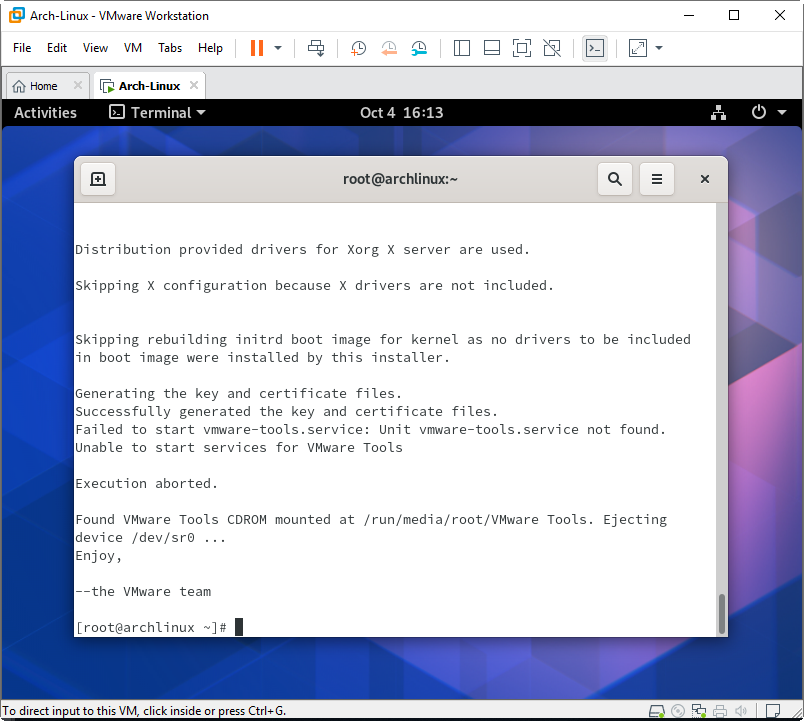
Now, we can run the installer.
# ./vmware-tools-distrib/vmware-install.pl
On my install, I accepted all the defaults by pressing the enter key for all the prompts. The screenshot of the resulting message after the installation process is shown below. Take note that it says that it was unable to start the vmware-tools service.
Step 5 – Create a VMware Tools Service File
Create the service file /etc/systemd/system/vmwaretools.service by starting a text editor.
# nano /etc/systemd/system/vmwaretools.service
Type in the following text and save the file.
[Unit]
Description=VMWare Tools Daemon

[Service]
ExecStart=/etc/init.d/vmware-tools start
ExecStop=/etc/init.d/vmware-tools stop
PIDFile=/var/lock/subsys/vmware
TimeoutSec=0
RemainAfterExit=yes

[Install]
WantedBy=multi-user.target

Step 6 – Start and Enable VMware Tools Service
To start the VMware Tools service, you can use the command:
# systemctl start vmwaretools.service
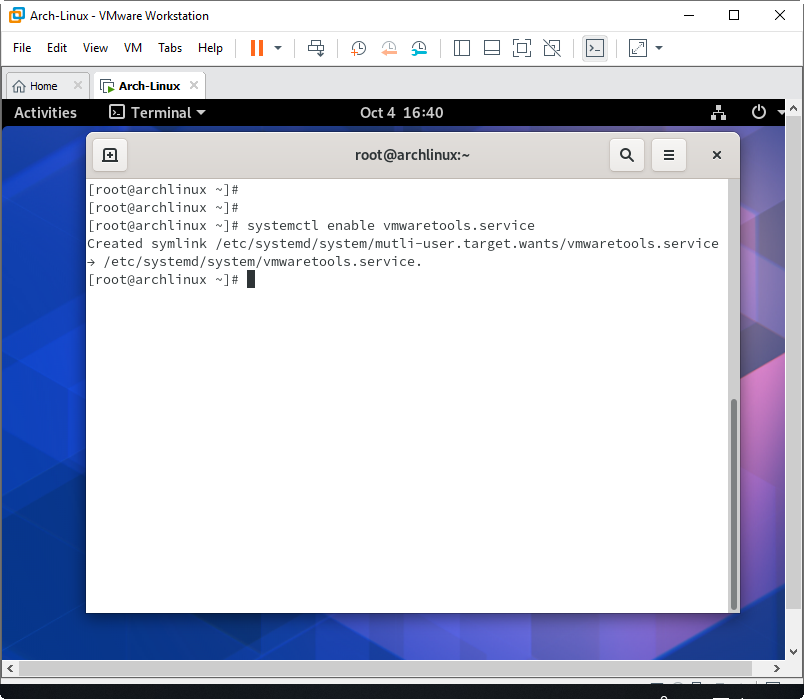
To make the service start at boot time, we use the command:
# systemctl enable vmwaretools.service
Step 7 – Reboot and Check
To see if VMware Tools successfully starts after after a reboot, type the command:
# systemctl status vmwaretools.service

That’s it, and we have now a working VMware Tools Daemon.
Related Arcticles:
How to Partition a Disk in Linux with fdisk
References:
https://wiki.archlinux.org/index.php/VMware/Installing_Arch_as_a_guest
For the first step… the first step…
What would be the command to download vmware tools ?
Thnax
just plug it from vmware. player->manage->install Vmware Tools
For garuda..
[Unit]
WantedBy=graphical.target
because of kdm login, etc.. it won’t start on boot otherwise.
This worked great! Thanks
Only issue is the clipboard still isn’t working between the host and guest (Windows host)
I needed to type the content of the /etc/systemd/system/vmwaretools.service file
It is working with BlackArch Linux 2021.08.15 image on VMware Workstation 16 Pro like a charm.
Excellent post! Very helpful!