In this tutorial, we are to going to assume that we are preparing a 30GB disk for the installation of a Linux distribution. For simplicity, we are going to partition the drive into only two (2) partitions. The first partition will be a 28GB partition to be used for mounting the whole Linux filesystem and the second 2GB partition is to be used as a swap partition. Advanced users usually partition a Linux drive into many partitions to create separate partitions for root, home, var, tmp, swap, etc.
Step 1 – Find the device name of the disk to be partitioned
1 2 | # lsblk # fdisk -l |

The device name for the first disk is /dev/sda, the second disk is /dev/sdb, the third disk is /dev/sdc, and so on.
In this case, we have a 30GB drive named /dev/sda.
Step 2 – Create the first partition
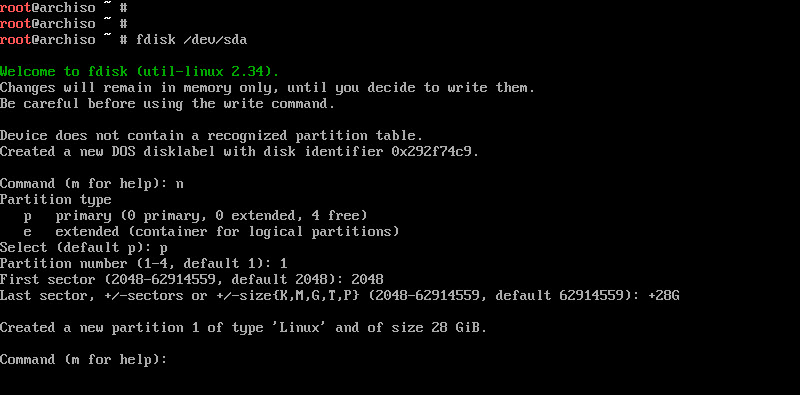
Run the fdisk command specifying the device name.
1 2 | # fdisk /dev/sda |

- Type “n” and press the “enter key”
- Type “p” or press the “enter key” to select the default partition type: primary
- Type “1” or press the “enter key” to select the default partition number: 1
- Type “2048” or press the “enter key” to select the default first sector: 2048
- Type “+28G” for the size of the partition, and press the “enter key”

That’s it for the first 28GB partition.
Step 3 – Create the second partition
- Type “n” and press the “enter key”
- Type “p” or press the “enter key” to select the default partition type: primary
- Type “2” or press the “enter key” to select the default partition number: 2
- Press the “enter key” to select the default first sector
- Press the “enter key” to select the default last sector
Take note that on the first sector and last sector prompt, we simply use the default values since we want to use all the remaining space of 2GB for the second partition.

The two (2) partitions are already created but we still need to write the changes to the disk.
Step 4 – Write the partitions to the disk
- Press “w” and the “enter key”

fdisk writes the changes to the partition table of the disk and automatically exits to the shell prompt.
Step 5 – Verify the created partitions
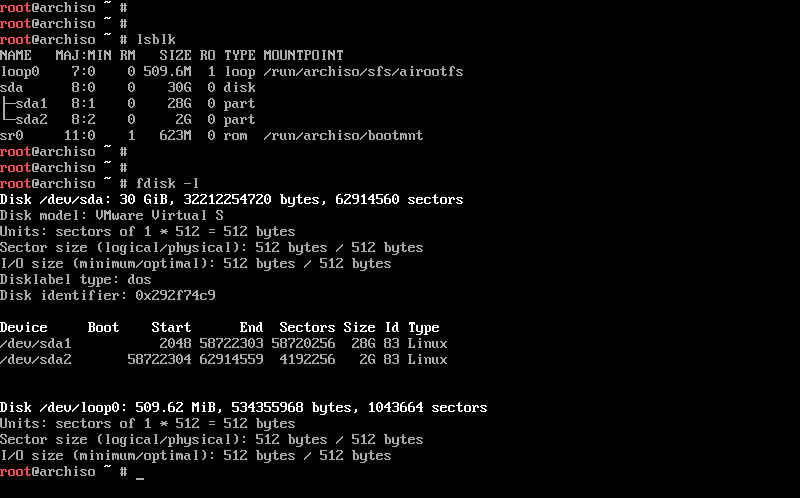
To verify if we really succeeded in partitioning the drive into two (2) partitions, we use lsblk and fdisk again.
1 2 | # lsblk # fdisk -l |

As the output shows, we have the two (2) partitions sda1 and sda2 under the device sda with the correct sizes of 28GB and 2GB respectively.
For the details of the commands used in this tutorial, please refer to:
fdisk
lsblk
Related Articles on How to Partition a Disk in Linux with fdisk
How to Install VMware Tools in Arch Linux
How to Install VMware Tools in Arch Linux
I appreciate this article, please add that if you install the base pacman package it doesn’t include nano, Vim etc. I wasn’t sure why I couldn’t edit or create hostnames or host files.
Thank you though.