The Arduino Integrated Development Environment or the Arduino IDE has been designed not only for programming Arduino development boards. It has been expanded to support other boards like the ESP8266. But you have to set up Arduino IDE for ESP8266 programming first by installing the ESP8266 cores.
If you don’t have Arduino IDE yet, please see How to Install Arduino IDE on Windows 10 if you’re using Windows. Otherwise, go to Arduino IDE download page and install the corresponding software for your machine.
How to Set up the Arduino IDE ESP8266 Cores
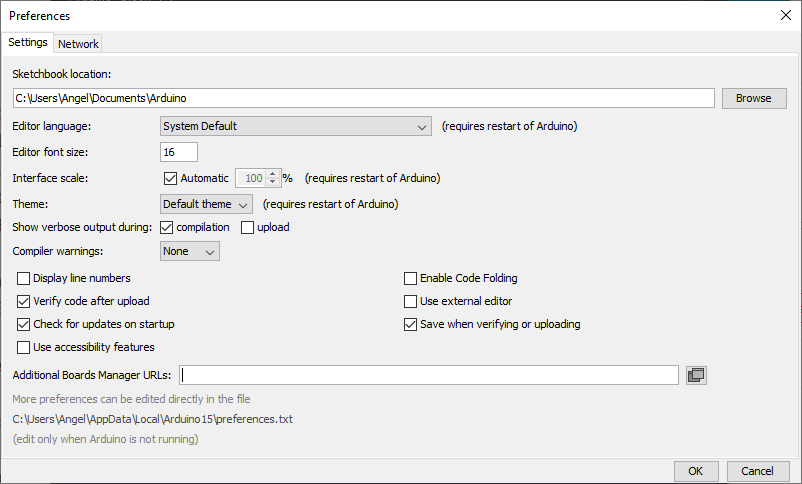
Step 1 – Start the Arduino IDE and open the Preferences window.
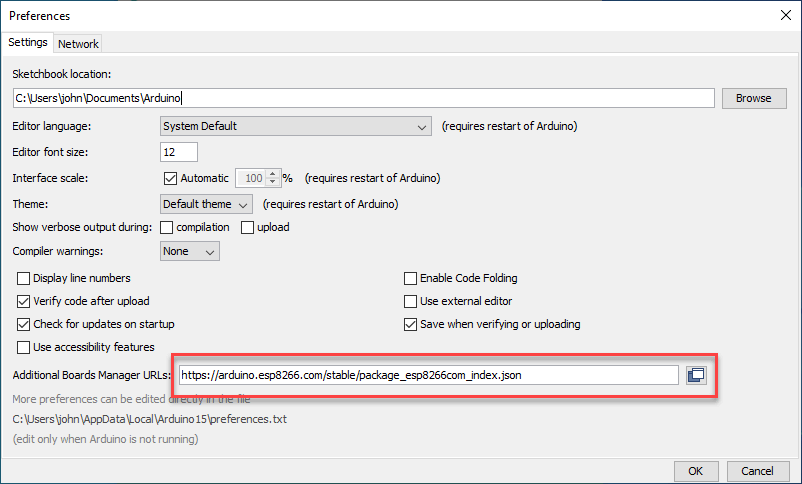
Step 2 – Type in the Board Manager link into the Additional Boards Manager URLs
Enter https://arduino.esp8266.com/stable/package_esp8266com_index.json into Additional Board Manager URLs field.
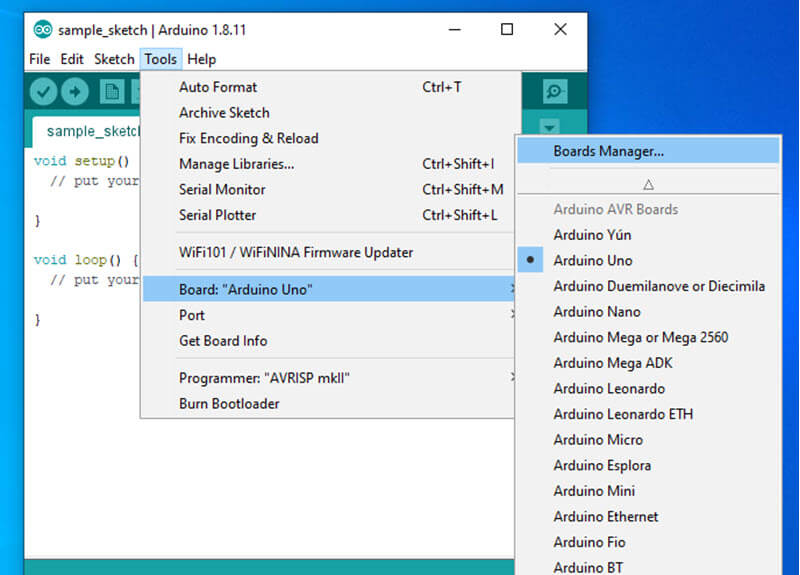
Step 3 – Open the Boards Manager
Open the Boards Manager in the Tools -> Board menu.
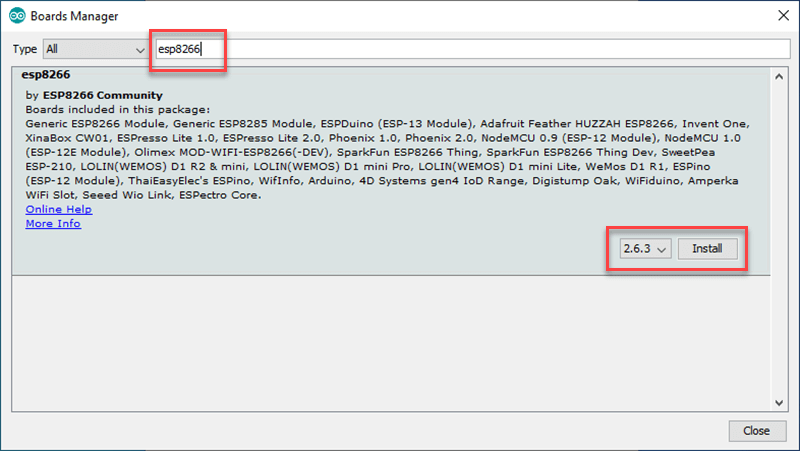
Step 4 – Search for ESP8266 and Install
Type in “ESP8266” on the search box. Then, click the Install button.
Step 5 – Select the ESP8266 Board
Select your ESP8266 board from Tools > Board menu after the installation.
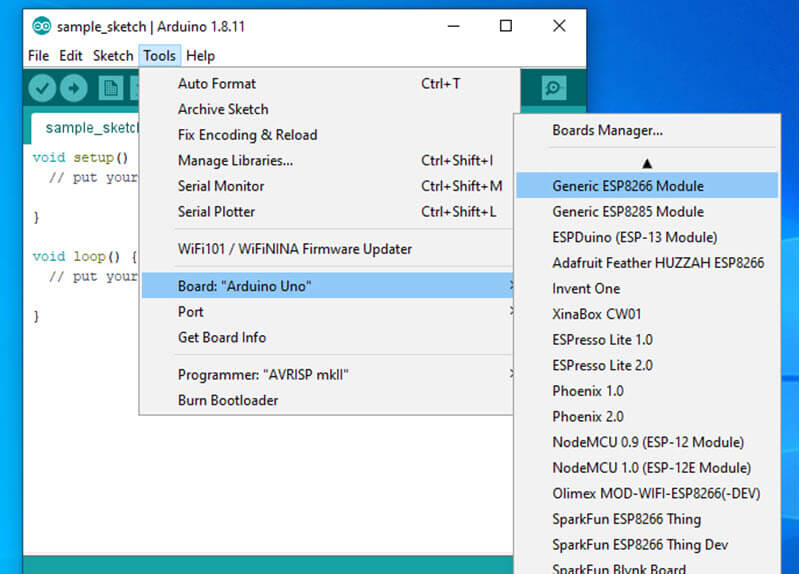
You’re done. Happy ESP8266 programming!!!
Related Articles on How to Set up Arduino IDE for ESP8266 Programming
Hardware
NodeMCU ESP32S Pin Configuration
NodeMCU V3 ESP8266 Pinout and Configuration
How to Save and Restore ESP8266 and ESP32 Firmware
How to Test NodeMCU V3 Using Esptool
How to Connect a DS3231 to NodeMCU V3
How to Use MCP4725 Module with Arduino
How to Use ADS1220 ADC Module with Arduino
Software
How to Install Arduino IDE on Windows 10
How to Install Esptool on Windows 10
References on How to Set up Arduino IDE for ESP8266 Programming
https://arduino-esp8266.readthedocs.io/en/latest/installing.html
https://github.com/esp8266/Arduino